Category: North American

North American dinner recipes feature hearty comfort food, barbecue favorites, seafood classics, and regional dishes inspired by American and Canadian cooking traditions. This category includes sandwiches, chowders, smoked meats, roasted dinners, and classic family-style meals.

These recipes focus on rich flavor, practical preparation, and satisfying portions that work well for both casual meals and gatherings. From lobster rolls and clam chowder to pulled pork sandwiches and roast turkey dinners, each recipe highlights familiar comfort food with approachable cooking methods.

Whether you are looking for traditional comfort meals, barbecue-inspired dishes, or coastal seafood favorites, this category offers a wide variety of flavorful North American recipes for everyday cooking.

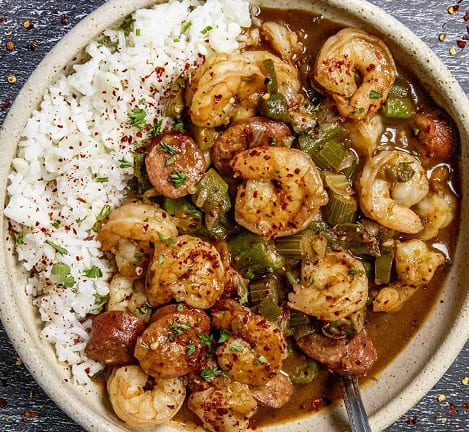
  • Shrimp Gumbo Recipe for Rich Louisiana Flavor

    Shrimp Gumbo Recipe for Rich Louisiana Flavor

    Shrimp gumbo recipe is a rich and comforting Louisiana-style stew made with shrimp, vegetables, spices, and a dark roux served over rice. This shrimp gumbo recipe combines bold Creole flavors with a hearty texture, making it perfect for family dinners, gatherings, or classic Southern comfort food meals.

    This shrimp gumbo recipe focuses on building flavor slowly through proper roux preparation and simmering techniques. The result is a deep, savory dish with tender shrimp, balanced spice, and authentic Gulf Coast flavor.


    Table of Contents

    • Ingredients
    • How to Make Shrimp Gumbo Recipe
    • Pro Tips for Best Results
    • Serving Suggestions for Shrimp Gumbo
    • Nutritional Information
    • Frequently Asked Questions


    Why This Shrimp Gumbo Recipe Works

    This shrimp gumbo recipe is designed to create rich flavor and proper gumbo texture.

    • Dark roux builds deep flavor
    • Shrimp adds seafood richness
    • Okra helps naturally thicken the gumbo
    • Slow simmering blends ingredients properly


    Ingredients

    Seafood & Stock

    • 1 lb shrimp, peeled and deveined
    • 6 cups shrimp stock or chicken stock

    Roux

    • ½ cup all-purpose flour
    • ½ cup vegetable oil or butter

    Vegetables & Aromatics

    • 1 onion, chopped
    • 1 green bell pepper, chopped
    • 2 celery stalks, chopped
    • 4 cloves garlic, minced
    • 1 can diced tomatoes (optional)
    • 1 cup sliced okra

    Seasonings

    • 2 teaspoons paprika
    • 1 teaspoon thyme
    • 1 teaspoon oregano
    • 1 teaspoon cayenne pepper
    • 2 teaspoons Creole seasoning
    • 2 bay leaves
    • Salt and black pepper

    For Serving

    • Cooked white rice
    • Green onions
    • Fresh parsley
    • Hot sauce (optional)
    • Filé powder (optional)


    How to Make Shrimp Gumbo Recipe

    Step 1: Prepare Stock

    Simmer shrimp shells with water and aromatics if making homemade shrimp stock.

    Strain and reserve stock.

    Step 2: Make the Roux

    Heat oil in a heavy pot.

    Whisk in flour and cook slowly, stirring constantly, until deep brown.

    Step 3: Cook Vegetables

    Add onion, bell pepper, and celery to the roux.

    Cook until softened, then add garlic.

    Step 4: Add Liquid and Seasoning

    Slowly whisk in stock.

    Add tomatoes if using, then seasonings and bay leaves.

    Step 5: Simmer

    Simmer gently for 30–40 minutes.

    Stir occasionally.

    Step 6: Add Okra and Shrimp

    Add okra and cook until tender.

    Add shrimp near the end and cook until pink.

    Step 7: Serve

    Remove bay leaves and serve over rice.

    Garnish with parsley and green onions.


    Pro Tips for Best Results

    • Stir the roux constantly to avoid burning
    • Use fresh shrimp for best flavor
    • Add shrimp near the end of cooking
    • Simmer slowly for deeper flavor


    Serving Suggestions for Shrimp Gumbo

    Serve with:

    • White rice
    • Cornbread
    • French bread
    • Salad

    This shrimp gumbo recipe pairs well with dishes like this New Orleans Jambalaya Recipe for a classic Louisiana-inspired meal.


    Nutritional Information (Approx. per serving)

    Calories: 350–450 kcal
    Protein: 25–30g
    Carbohydrates: 25–35g
    Fat: 15–20g
    Sodium: Moderate to high


    Storage and Reheating

    Store in the refrigerator for up to 3–4 days.

    For best results:

    • Reheat slowly on the stove
    • Add broth if gumbo thickens too much


    Frequently Asked Questions

    What is the difference between gumbo and jambalaya?

    Gumbo is a stew served over rice, while jambalaya cooks the rice directly in the pot.

    Can I freeze shrimp gumbo?

    Yes, it freezes well for up to 3 months.


    How to Make a Proper Dark Roux

    This shrimp gumbo recipe depends heavily on the roux for flavor and texture.

    Cooking flour and oil slowly creates the deep, nutty flavor that gumbo is known for. The darker the roux becomes, the richer the gumbo tastes.

    Constant stirring is important because burnt roux develops bitterness and cannot be corrected.

    A properly cooked roux gives the gumbo both color and body without making it overly thick.


    How to Keep Shrimp Tender in Gumbo

    The key to this shrimp gumbo recipe is adding shrimp at the correct stage.

    Shrimp cook very quickly and can become rubbery if overcooked. Adding them near the end of simmering helps preserve their texture and flavor.

    Gentle simmering instead of boiling also helps maintain tenderness.

    Using medium or large shrimp works best because they hold their texture during cooking.


    Variations You Can Try

    • Add crab or crawfish
    • Include smoked sausage
    • Make it extra spicy with hot sauce
    • Use chicken and sausage instead of seafood


    Common Mistakes to Avoid

    • Burning the roux
    • Overcooking shrimp
    • Using too much salt early
    • Boiling instead of simmering


    Make-Ahead and Storage Tips

    This shrimp gumbo recipe is excellent for meal prep because the flavor improves over time.

    • Prepare a day ahead for deeper flavor
    • Store up to 4 days refrigerated
    • Freeze individual portions for easy meals


    How to Turn This Into a Complete Meal

    This shrimp gumbo recipe becomes a complete Southern-style dinner when paired with the right sides.

    Serve it with rice, cornbread, French bread, or a simple salad for balance. Adding hot sauce or extra parsley at serving time can enhance freshness and spice.

    This makes it a versatile option for both casual dinners and larger gatherings.


    Final Thoughts

    This shrimp gumbo recipe is rich, flavorful, and deeply comforting, making it a dependable choice for authentic Louisiana-style cooking.


    Related Recipes You’ll Love

    – New Orleans Jambalaya Recipe
    – Smoked Sausages with Beans Recipe
    – Chili Con Carne Recipe


    Explore More Easy Dinner Recipes

    Discover more quick and simple meal ideas for any night:

    – Easy Dinner Recipes


    Author Note

    Dinners Recipe Team shares simple, reliable recipes designed for home cooks. Our goal is to make cooking easier while delivering flavorful, satisfying meals.
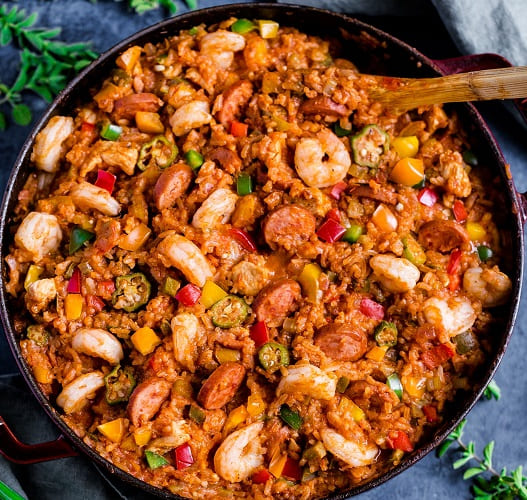
  • New Orleans Jambalaya Recipe – Easy One-Pot Cajun Rice Dish

    New Orleans Jambalaya Recipe – Easy One-Pot Cajun Rice Dish

    New Orleans jambalaya recipe is a bold and hearty one-pot rice dish made with chicken, sausage, shrimp, vegetables, and Cajun-inspired spices. This New Orleans jambalaya recipe combines smoky, savory, and spicy flavors into a filling meal that works well for family dinners, gatherings, or meal prep.

    This New Orleans jambalaya recipe focuses on building flavor step by step while allowing the rice to absorb the rich broth and seasonings. The result is a balanced dish packed with protein, texture, and classic Louisiana flavor.


    Table of Contents

    • Ingredients
    • How to Make New Orleans Jambalaya Recipe
    • Pro Tips for Best Results
    • Serving Suggestions for New Orleans Jambalaya
    • Nutritional Information
    • Frequently Asked Questions


    Why This New Orleans Jambalaya Recipe Works

    This New Orleans jambalaya recipe is designed to create deep flavor using simple one-pot cooking techniques.

    • Rice absorbs rich seasoning and broth
    • Sausage adds smoky flavor
    • Shrimp and chicken create balance
    • One-pot cooking keeps preparation simple


    Ingredients

    Protein & Seafood

    • 1 lb chicken thighs, cut into bite-sized pieces
    • 1 lb smoked andouille sausage, sliced
    • 1 lb shrimp, peeled and deveined

    Vegetables & Aromatics

    • 2 tablespoons olive oil
    • 1 large onion, chopped
    • 1 green bell pepper, chopped
    • 1 red bell pepper, chopped
    • 2 celery stalks, chopped
    • 4 cloves garlic, minced
    • 2 tomatoes, chopped

    Rice & Liquid

    • 2 cups long-grain rice
    • 4 cups chicken broth

    Spices

    • 2 teaspoons paprika
    • 1 teaspoon oregano
    • 1 teaspoon thyme
    • 1 teaspoon cayenne pepper
    • 1 teaspoon black pepper
    • 1 teaspoon salt
    • 2 bay leaves
    • 1 teaspoon Creole seasoning (optional)

    Optional Garnishes

    • Green onions
    • Fresh parsley
    • Lemon wedges
    • Hot sauce


    How to Make New Orleans Jambalaya Recipe

    Step 1: Prepare Ingredients

    Cut chicken into pieces, slice sausage, clean shrimp, and chop vegetables.

    Step 2: Cook Chicken and Sausage

    Heat oil in a large pot.

    Cook chicken until browned and remove.

    Cook sausage until lightly crisp and remove.

    Step 3: Build the Flavor Base

    Add onion, bell peppers, and celery to the pot.

    Cook until softened, then add garlic and tomatoes.

    Step 4: Add Rice and Spices

    Stir in paprika, oregano, thyme, cayenne, and Creole seasoning.

    Add rice and cook briefly to toast lightly.

    Step 5: Simmer

    Return chicken and sausage to the pot.

    Add broth and bay leaves.

    Bring to a boil, then reduce heat and simmer covered for about 25 minutes.

    Step 6: Add Shrimp

    Fold in shrimp during the last few minutes of cooking.

    Cook until shrimp turn pink and fully cooked.

    Step 7: Serve

    Remove bay leaves, fluff rice, garnish, and serve hot.


    Pro Tips for Best Results

    • Use long-grain rice for proper texture
    • Add shrimp near the end to avoid overcooking
    • Simmer gently to prevent mushy rice
    • Taste and adjust seasoning gradually


    Serving Suggestions for New Orleans Jambalaya

    Serve with:

    • Cornbread
    • Salad
    • Garlic bread
    • Roasted vegetables

    This New Orleans jambalaya recipe pairs well with dishes like this Chili Con Carne Recipe for a hearty Southern-style meal.


    Nutritional Information (Approx. per serving)

    Calories: 450–550 kcal
    Protein: 30–35g
    Carbohydrates: 40–50g
    Fat: 15–20g
    Sodium: Moderate to high


    Storage and Reheating

    Store in the refrigerator for up to 3–4 days.

    For best results:

    • Reheat slowly with a splash of broth
    • Avoid overcooking shrimp during reheating


    Frequently Asked Questions

    What is the difference between Cajun and Creole jambalaya?

    Creole jambalaya typically includes tomatoes, while Cajun jambalaya usually does not.

    Can I freeze jambalaya?

    Yes, it freezes well for up to 3 months.


    How to Build Authentic Jambalaya Flavor

    This New Orleans jambalaya recipe depends on layering flavors properly.

    Cooking the chicken and sausage first develops a rich base inside the pot. The vegetables absorb these flavors while releasing their own sweetness and aroma.

    Toasting the rice briefly before simmering helps it absorb seasoning more effectively and improves texture.

    Using broth instead of plain water creates a deeper and more balanced final dish.


    How to Keep Jambalaya Rice From Becoming Mushy

    The key to this New Orleans jambalaya recipe is controlling liquid and cooking time.

    Using long-grain rice helps maintain structure during simmering. Stirring too often can break the rice and release excess starch, leading to a softer texture.

    Allowing the rice to cook covered on low heat gives it time to absorb liquid evenly without becoming overcooked.

    Adding shrimp at the end also prevents overcooking and keeps the seafood tender.


    Variations You Can Try

    • Make it Cajun-style without tomatoes
    • Use chicken only or sausage only
    • Add extra shrimp or seafood
    • Use brown rice for a different texture


    Common Mistakes to Avoid

    • Overcooking shrimp
    • Using too much liquid
    • Stirring too frequently
    • Cooking rice at high heat


    Make-Ahead and Storage Tips

    This New Orleans jambalaya recipe works very well for meal prep.

    • Store leftovers up to 4 days
    • Freeze portions individually
    • Reheat gently with added broth


    How to Turn This Into a Complete Meal

    This New Orleans jambalaya recipe is already a balanced one-pot meal, but sides can add more variety.

    Serve it with cornbread, salad, roasted vegetables, or garlic bread for a fuller Southern-inspired dinner. A small amount of hot sauce or lemon juice can also brighten the flavors.

    This makes it ideal for gatherings, holidays, or large family meals.


    Final Thoughts

    This New Orleans jambalaya recipe is bold, filling, and easy to prepare, making it a dependable option for flavorful one-pot cooking.


    Related Recipes You’ll Love

    – Chili Con Carne Recipe
    – Smoked Sausages with Beans Recipe
    – Steak Burrito Bowl Recipe


    Explore More Easy Dinner Recipes

    Discover more quick and simple meal ideas for any night:

    – Easy Dinner Recipes


    Author Note

    Dinners Recipe Team shares simple, reliable recipes designed for home cooks. Our goal is to make cooking easier while delivering flavorful, satisfying meals.
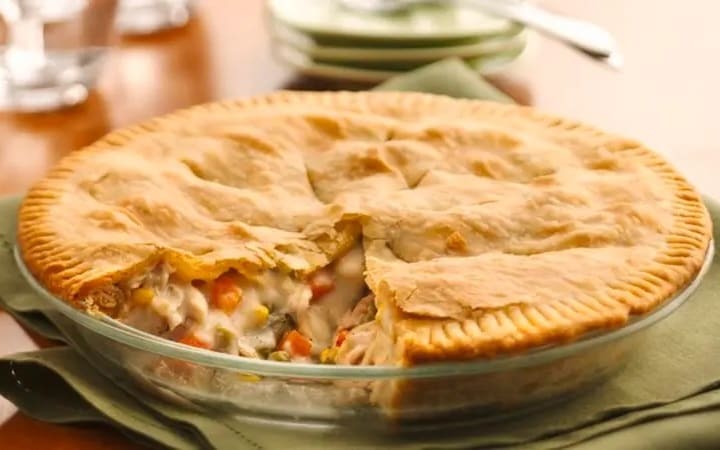
  • Classic Chicken Pot Pie Recipe

    Classic Chicken Pot Pie Recipe

    Classic chicken pot pie recipe is a rich and comforting dish made with tender chicken, vegetables, creamy sauce, and a flaky golden crust. This classic chicken pot pie recipe combines simple ingredients and balanced flavors to create a hearty meal perfect for family dinners and cozy evenings.

    This classic chicken pot pie recipe is designed to produce a creamy filling with a crisp, buttery crust while keeping preparation straightforward and reliable.


    Table of Contents

    • Ingredients
    • How to Make Classic Chicken Pot Pie Recipe
    • Pro Tips for Best Results
    • Serving Suggestions for Chicken Pot Pie
    • Nutritional Information
    • Frequently Asked Questions


    Why This Classic Chicken Pot Pie Recipe Works

    This classic chicken pot pie recipe creates a rich and balanced comfort-food dish.

    • Creamy filling stays rich without becoming too heavy
    • Chicken and vegetables create balanced texture
    • Flaky crust adds crispness and structure
    • Simple ingredients create dependable flavor


    Ingredients

    For the Filling

    • 2 tablespoons butter
    • 1 tablespoon olive oil
    • 1 onion, chopped
    • 2 garlic cloves, minced
    • 2 carrots, diced
    • 2 celery stalks, diced
    • 1 cup frozen peas
    • 3 cups cooked chicken
    • ⅓ cup flour
    • 3 cups chicken broth
    • 1 cup milk or cream
    • 1 teaspoon salt
    • ½ teaspoon black pepper
    • ½ teaspoon thyme
    • ½ teaspoon parsley
    • ¼ teaspoon nutmeg (optional)

    For the Crust

    • Refrigerated pie crusts or homemade dough

    For Egg Wash

    • 1 egg
    • 1 tablespoon water


    How to Make Classic Chicken Pot Pie Recipe

    Step 1: Cook the Vegetables

    Heat butter and oil in a skillet.

    Cook onion, carrots, celery, and garlic until softened.

    Step 2: Make the Filling

    Stir in flour and cook briefly.

    Slowly add broth and milk while stirring until smooth and thickened.

    Step 3: Add Chicken and Peas

    Mix in cooked chicken and peas.

    Season with salt, pepper, thyme, parsley, and nutmeg.

    Step 4: Prepare the Crust

    Place bottom crust into a pie dish.

    Add filling evenly.

    Step 5: Top and Bake

    Cover with top crust and seal edges.

    Cut small slits in the crust and brush with egg wash.

    Bake at 400°F (200°C) until golden brown and bubbling.

    Step 6: Rest and Serve

    Allow pie to rest briefly before slicing and serving.


    Pro Tips for Best Results

    • Do not overfill the pie
    • Let filling thicken before baking
    • Brush crust with egg wash for color
    • Allow pie to rest before slicing


    Serving Suggestions for Chicken Pot Pie

    Serve with:

    • Green salad
    • Roasted vegetables
    • Mashed potatoes
    • Steamed green beans

    This classic chicken pot pie recipe pairs well with dishes like this Turkey Roast with Gravy Recipe for a comforting dinner spread.


    Nutritional Information (Approx. per serving)

    Calories: 500–550 kcal
    Protein: 25–30g
    Carbohydrates: 35–40g
    Fat: 25–30g
    Sodium: Moderate to high


    Storage and Reheating

    Store in the refrigerator for up to 4 days.

    For best results:

    • Reheat in the oven
    • Avoid microwaving if possible to keep crust crisp


    Frequently Asked Questions

    Can I use puff pastry instead of pie crust?

    Yes, puff pastry creates a lighter and flakier topping.

    Can I freeze chicken pot pie?

    Yes, it freezes well before or after baking.


    How to Keep Chicken Pot Pie Creamy

    This classic chicken pot pie recipe depends on properly balancing liquid and thickener.

    Cooking flour briefly before adding liquid helps eliminate raw flour taste and creates a smooth sauce. Slowly adding broth and milk prevents lumps from forming.

    Allowing the filling to simmer until thickened helps create the proper texture without becoming watery during baking.

    Using cream instead of milk creates a richer filling if desired.


    How to Achieve a Flaky Golden Crust

    The crust is one of the most important parts of this classic chicken pot pie recipe.

    Brushing the crust with egg wash helps it become golden and glossy while baking. Cutting slits into the top crust allows steam to escape and prevents sogginess.

    Avoid overworking pie dough to maintain flakiness and texture.

    Allowing the pie to cool briefly after baking also helps the filling set properly before slicing.


    Variations You Can Try

    • Use turkey instead of chicken
    • Add mushrooms or corn
    • Use puff pastry topping
    • Make individual mini pot pies


    Common Mistakes to Avoid

    • Filling that is too thin
    • Overbaking the crust
    • Not venting the top crust
    • Cutting before resting


    Make-Ahead and Storage Tips

    This classic chicken pot pie recipe works well for meal prep.

    • Prepare filling ahead of time
    • Assemble before baking
    • Freeze unbaked pies
    • Store leftovers up to 4 days


    How to Turn This Into a Complete Meal

    This classic chicken pot pie recipe can easily become a full comfort-food dinner.

    Serve it with vegetables or a fresh salad to balance the richness of the creamy filling and buttery crust. Lighter side dishes help create a more balanced meal while keeping the pot pie as the centerpiece.

    This makes it ideal for family dinners, holidays, and cold-weather meals.


    Final Thoughts

    This classic chicken pot pie recipe is creamy, hearty, and comforting, making it a dependable meal for both casual dinners and special occasions.


    Related Recipes You’ll Love

    – Turkey Roast with Gravy Recipe
    – Bacon Wrapped Meatloaf
    – Smoked Sausages with Beans Recipe


    Explore More Chicken Dinner Recipes

    Discover more easy and flavorful chicken dinner ideas below:

    – Chicken Dinner Recipes


    Explore More Easy Dinner Recipes

    Discover more quick and simple meal ideas for any night:

    – Easy Dinner Recipes


    Author Note

    Dinners Recipe Team shares simple, reliable recipes designed for home cooks. Our goal is to make cooking easier while delivering flavorful, satisfying meals.
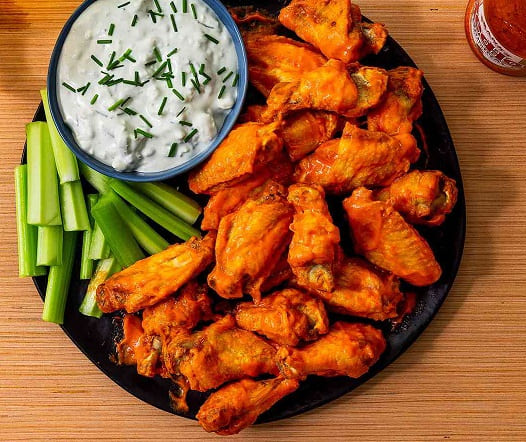
  • Classic Buffalo Wings Recipe

    Classic Buffalo Wings Recipe

    Classic Buffalo wings recipe is a bold and flavorful appetizer made with crispy chicken wings tossed in a buttery hot sauce. This classic Buffalo wings recipe creates the perfect balance of crispy texture, tangy heat, and juicy chicken, making it ideal for parties, game days, or casual dinners.

    This classic Buffalo wings recipe focuses on achieving crispy wings while keeping preparation simple and reliable whether you bake, fry, or air fry them.


    Table of Contents

    • Ingredients
    • How to Make Classic Buffalo Wings Recipe
    • Pro Tips for Best Results
    • Serving Suggestions for Buffalo Wings
    • Nutritional Information
    • Frequently Asked Questions


    Why This Classic Buffalo Wings Recipe Works

    This classic Buffalo wings recipe is designed to create crispy wings with balanced flavor.

    • Baking powder helps create crisp skin
    • Hot sauce and butter create classic flavor
    • Multiple cooking methods keep it flexible
    • Simple ingredients create authentic taste


    Ingredients

    For the Wings

    • 2 pounds chicken wings
    • 1 tablespoon baking powder
    • 1 teaspoon salt
    • ½ teaspoon black pepper
    • ½ teaspoon garlic powder

    For the Buffalo Sauce

    • ½ cup hot sauce
    • ½ cup butter
    • 1 tablespoon vinegar
    • ½ teaspoon Worcestershire sauce
    • ½ teaspoon cayenne pepper (optional)
    • ½ teaspoon garlic powder

    For Serving

    • Ranch or blue cheese dressing
    • Celery sticks
    • Carrot sticks


    How to Make Classic Buffalo Wings Recipe

    Step 1: Prepare the Wings

    Pat wings dry thoroughly.

    Toss with baking powder, salt, pepper, and garlic powder.

    Step 2: Cook the Wings

    Bake at 425°F (220°C), fry, or air fry until crispy and fully cooked.

    Step 3: Make the Sauce

    Melt butter and whisk with hot sauce, vinegar, Worcestershire sauce, cayenne, and garlic powder.

    Step 4: Toss the Wings

    Place cooked wings in a large bowl and coat evenly with Buffalo sauce.

    Step 5: Serve

    Serve hot with celery, carrots, and dipping sauce.


    Pro Tips for Best Results

    • Dry wings thoroughly before cooking
    • Use baking powder, not baking soda
    • Do not overcrowd the pan or fryer
    • Toss wings in sauce just before serving


    Serving Suggestions for Buffalo Wings

    Serve with:

    • Ranch dressing
    • Blue cheese dressing
    • Celery sticks
    • Fries or potato wedges

    This classic Buffalo wings recipe pairs well with dishes like this Pulled Pork Sandwich for a complete game-day meal.


    Nutritional Information (Approx. per serving)

    Calories: 400–450 kcal
    Protein: 25–30g
    Carbohydrates: 2–5g
    Fat: 30–35g
    Sodium: High


    Storage and Reheating

    Store in the refrigerator for up to 3 days.

    For best results:

    • Reheat in the oven or air fryer
    • Avoid microwaving to maintain crispiness


    Frequently Asked Questions

    Can I bake Buffalo wings instead of frying?

    Yes, baking creates crispy wings with less oil.

    What hot sauce works best?

    Frank’s RedHot is the traditional choice for authentic Buffalo flavor.


    How to Make Buffalo Wings Crispy

    This classic Buffalo wings recipe depends on properly drying and cooking the wings.

    Patting the wings dry removes moisture that can prevent crispiness. Baking powder helps draw additional moisture from the skin and promotes browning.

    Cooking at high temperature allows the skin to crisp without overcooking the meat.

    Using a wire rack while baking improves airflow and creates more even crisping.


    How to Balance Buffalo Sauce Flavor

    The Buffalo sauce should balance heat, tanginess, and richness.

    Butter softens the sharp heat of hot sauce while adding smooth texture. Vinegar adds brightness and helps create the signature Buffalo flavor profile.

    You can adjust the ratio of butter and hot sauce depending on desired spice level.

    Adding extra cayenne increases heat without changing consistency.


    Variations You Can Try

    • Honey Buffalo wings
    • Garlic Parmesan wings
    • Extra spicy wings
    • BBQ Buffalo wings


    Common Mistakes to Avoid

    • Not drying wings properly
    • Using baking soda instead of baking powder
    • Overcrowding during cooking
    • Tossing wings too early


    Make-Ahead and Storage Tips

    This classic Buffalo wings recipe works well for entertaining.

    • Cook wings ahead of time
    • Reheat before saucing
    • Store leftovers up to 3 days
    • Reheat in oven for crisp texture


    How to Turn This Into a Complete Meal

    This classic Buffalo wings recipe can easily become a full casual dinner.

    Serve the wings with fries, coleslaw, or vegetables for a more balanced plate. Adding dips and side dishes creates a complete game-day or party-style spread.

    This also works well for gatherings where multiple shareable dishes are served together.


    Final Thoughts

    This classic Buffalo wings recipe is crispy, spicy, and flavorful, making it one of the most dependable and crowd-pleasing appetizers you can prepare at home.


    Related Recipes You’ll Love

    – Pulled Pork Sandwich
    – Chili Con Carne Recipe
    – Smoked Sausages with Beans Recipe


    Explore More Chicken Dinner Recipes

    Discover more easy and flavorful chicken dinner ideas below:

    – Chicken Dinner Recipes


    Explore More Easy Dinner Recipes

    Discover more quick and simple meal ideas for any night:

    – Easy Dinner Recipes


    Author Note

    Dinners Recipe Team shares simple, reliable recipes designed for home cooks. Our goal is to make cooking easier while delivering flavorful, satisfying meals.

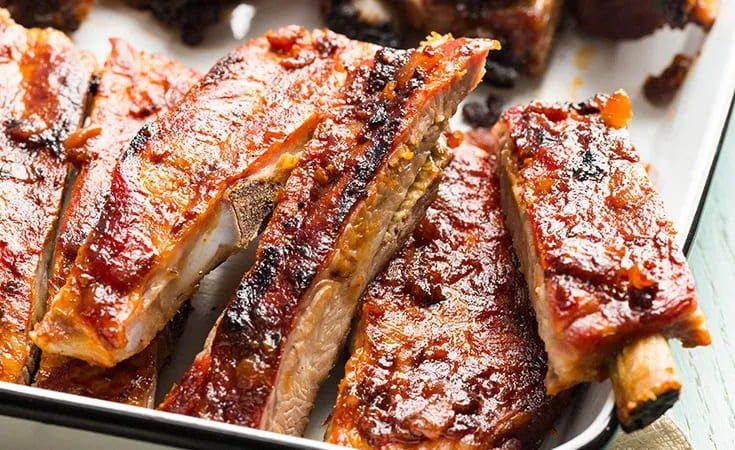
  • Classic BBQ Ribs Recipe

    Classic BBQ Ribs Recipe

    Classic BBQ ribs recipe is a smoky and flavorful dish made with slow-cooked pork ribs coated in a rich barbecue sauce. This classic BBQ ribs recipe creates tender meat with a caramelized glaze and balanced seasoning, making it ideal for cookouts, gatherings, and comfort-food dinners.

    This classic BBQ ribs recipe focuses on low-and-slow cooking techniques that help produce juicy ribs with deep barbecue flavor and a tender texture.


    Table of Contents

    • Ingredients
    • How to Make Classic BBQ Ribs Recipe
    • Pro Tips for Best Results
    • Serving Suggestions for BBQ Ribs
    • Nutritional Information
    • Frequently Asked Questions


    Why This Classic BBQ Ribs Recipe Works

    This classic BBQ ribs recipe is designed to create tender and flavorful ribs.

    • Slow cooking keeps ribs tender
    • Dry rub builds deep flavor
    • BBQ sauce creates caramelized texture
    • Multiple cooking methods provide flexibility


    Ingredients

    For the Ribs

    • 2 racks pork ribs
    • 2 tablespoons olive oil

    For the Dry Rub

    • ¼ cup brown sugar
    • 2 tablespoons paprika
    • 1 tablespoon smoked paprika
    • 1 tablespoon garlic powder
    • 1 tablespoon onion powder
    • 1 teaspoon cayenne pepper
    • 1 teaspoon black pepper
    • 1 tablespoon salt
    • 1 teaspoon dried mustard
    • 1 teaspoon chili powder
    • 1 teaspoon cumin

    For the BBQ Sauce

    • 1 cup ketchup
    • ½ cup apple cider vinegar
    • ¼ cup brown sugar
    • 2 tablespoons honey
    • 1 tablespoon Worcestershire sauce
    • 1 teaspoon smoked paprika
    • ½ teaspoon cayenne pepper
    • Salt and pepper to taste


    How to Make Classic BBQ Ribs Recipe

    Step 1: Prepare the Ribs

    Remove the membrane from the back of the ribs.

    Pat dry and rub lightly with olive oil.

    Step 2: Apply the Dry Rub

    Mix all dry rub ingredients and coat the ribs evenly.

    Refrigerate for at least 2 hours if possible.

    Step 3: Preheat the Oven or Grill

    Preheat oven to 300°F (150°C) or prepare grill for indirect heat.

    Step 4: Cook the Ribs

    Bake or grill low and slow until tender.

    Step 5: Make the BBQ Sauce

    Simmer sauce ingredients until thickened.

    Step 6: Glaze the Ribs

    Brush ribs with BBQ sauce and cook briefly to caramelize.

    Step 7: Rest and Serve

    Allow ribs to rest briefly before slicing and serving.


    Pro Tips for Best Results

    • Remove the membrane for better texture
    • Cook low and slow
    • Do not rush caramelization
    • Let ribs rest before cutting


    Serving Suggestions for BBQ Ribs

    Serve with:

    • Coleslaw
    • Cornbread
    • Baked beans
    • Potato salad

    This classic BBQ ribs recipe pairs well with dishes like this Pulled Pork Sandwich for a complete barbecue-style meal.


    Nutritional Information (Approx. per serving)

    Calories: 500–550 kcal
    Protein: 35–40g
    Carbohydrates: 20–30g
    Fat: 30–35g
    Sodium: Moderate to high


    Storage and Reheating

    Store in the refrigerator for up to 4 days.

    For best results:

    • Reheat in the oven
    • Add extra sauce if needed
    • Avoid overheating


    Frequently Asked Questions

    Should ribs be boiled before cooking?

    No, slow cooking produces better texture and flavor.

    What temperature are ribs done?

    Ribs are typically tender around 190–203°F internally.


    How to Make BBQ Ribs Tender

    This classic BBQ ribs recipe depends on slow cooking at controlled temperatures.

    Cooking ribs low and slow allows the connective tissue to break down gradually, creating tender meat without drying it out.

    Keeping the ribs covered during part of the cooking process helps trap moisture and prevents toughness.

    Allowing the ribs to rest after cooking helps retain juices and improves texture.


    How to Build Deep BBQ Flavor

    The dry rub and sauce work together to create balanced barbecue flavor.

    Brown sugar helps caramelization while paprika, garlic powder, and spices create depth and smokiness.

    Cooking the sauce slowly helps concentrate flavor and creates the proper consistency for glazing.

    Applying sauce toward the end of cooking prevents burning while still creating a sticky finish.


    Variations You Can Try

    • Spicy BBQ ribs
    • Honey garlic ribs
    • Smoked ribs
    • Dry rub ribs without sauce


    Common Mistakes to Avoid

    • Cooking ribs too quickly
    • Skipping membrane removal
    • Applying sauce too early
    • Overcooking during glazing


    Make-Ahead and Storage Tips

    This classic BBQ ribs recipe works well for gatherings and meal prep.

    • Season ribs ahead of time
    • Refrigerate overnight for deeper flavor
    • Store leftovers up to 4 days
    • Freeze cooked ribs if needed


    How to Turn This Into a Complete Meal

    This classic BBQ ribs recipe can easily become a full barbecue dinner.

    Serve the ribs with classic sides like coleslaw, baked beans, cornbread, or potato salad for a balanced and filling meal. Adding grilled vegetables or salad can help balance the richness of the ribs and sauce.

    This makes the recipe ideal for family gatherings, cookouts, and casual entertaining.


    Final Thoughts

    This classic BBQ ribs recipe is smoky, tender, and packed with flavor, making it a dependable choice for barbecue lovers and comfort-food meals.


    Related Recipes You’ll Love

    – Pulled Pork Sandwich
    – Classic Buffalo Wings Recipe
    – Smoked Sausages with Beans Recipe
    – Philly Cheesesteak Recipe


    Explore More Easy Dinner Recipes

    Discover more quick and simple meal ideas for any night:

    – Easy Dinner Recipes


    Author Note

    Dinners Recipe Team shares simple, reliable recipes designed for home cooks. Our goal is to make cooking easier while delivering flavorful, satisfying meals.
  • Southern Fried Chicken Recipe

    Southern Fried Chicken Recipe

    Southern fried chicken recipe is a classic comfort food known for its crispy golden crust and juicy, flavorful meat. This southern fried chicken recipe is easy to make at home with simple ingredients and reliable results.

    This southern fried chicken recipe uses a buttermilk marinade and a seasoned flour coating to create chicken that is crunchy on the outside and tender on the inside, making it perfect for family dinners or gatherings. This dish is a staple of Southern cuisine, known for its bold flavors and comforting style.


    Table of Contents

    • Ingredients
    • How to Make Southern Fried Chicken Recipe
    • Pro Tips for Best Results
    • Serving Suggestions for Southern Fried Chicken
    • Nutritional Information
    • Frequently Asked Questions


    Why This Southern Fried Chicken Recipe Works

    This southern fried chicken recipe is designed to create a crispy coating while keeping the inside tender and juicy.

    • Buttermilk marinade keeps the chicken tender and juicy
    • A balanced seasoning blend adds deep flavor
    • Double dredging creates extra crispiness
    • Proper oil temperature ensures even cooking


    Ingredients

    For the Chicken

    • 3 to 4 pounds chicken pieces (drumsticks, thighs, breasts, or wings)
    • 2 cups buttermilk
    • 2 teaspoons hot sauce (optional)
    • 1 teaspoon salt
    • 1 teaspoon black pepper

    For the Coating

    • 3 cups all-purpose flour
    • 2 teaspoons paprika
    • 1 teaspoon garlic powder
    • 1 teaspoon onion powder
    • 1 teaspoon cayenne pepper
    • 2 teaspoons salt
    • 1 teaspoon black pepper
    • 1 teaspoon dried thyme or oregano

    For Frying

    • Vegetable oil, peanut oil, or canola oil


    How to Make Southern Fried Chicken

    Step 1: Marinate the Chicken

    Place chicken in a bowl or bag. Add buttermilk, salt, pepper, and hot sauce. Refrigerate for at least 4 hours.

    Step 2: Prepare the Seasoned Flour

    Mix flour, paprika, garlic powder, onion powder, cayenne, salt, pepper, and thyme.

    Step 3: Coat the Chicken

    Dredge chicken in flour. For extra crispiness, dip again in buttermilk and coat again.

    Let rest for 15 minutes before frying.

    Step 4: Heat the Oil

    Heat oil to 350°F (175°C).

    Step 5: Fry the Chicken

    Fry in batches for 12–15 minutes until golden brown and fully cooked.

    Step 6: Drain and Rest

    Place on a rack and rest before serving.


    Pro Tips for Best Results

    • Keep oil temperature steady
    • Let coated chicken rest before frying
    • Avoid overcrowding the pan
    • Double dredging improves texture


    Serving Suggestions for Southern Fried Chicken

    This southern fried chicken recipe pairs well with classic comfort food sides.

    Serve with:

    • Mashed potatoes
    • Coleslaw
    • Biscuits
    • Corn on the cob


    Nutritional Information (Approx. per serving)

    Calories: 450–550 kcal
    Protein: 30–35g
    Carbohydrates: 20–25g
    Fat: 25–30g
    Sodium: Moderate to high


    Storage and Reheating

    Store in the refrigerator for up to 3 days.

    For best results:

    • Reheat in oven at 375°F
    • Avoid microwaving to keep it crispy


    Frequently Asked Questions

    Can I make this without buttermilk?

    Yes, mix milk with vinegar or lemon juice.

    How do I keep the coating from falling off?

    Let the chicken rest before frying.

    Can I bake instead of fry?

    Yes, but texture will differ.


    How to Get Crispy Fried Chicken Every Time

    The key to this southern fried chicken recipe is achieving a crispy coating while keeping the inside juicy.

    Letting the coated chicken rest before frying helps the coating stick better. Maintaining the correct oil temperature ensures even cooking.

    Frying in batches prevents temperature drops and improves texture.


    How to Keep the Chicken Juicy Inside

    Juiciness comes from both marinating and proper cooking.

    Buttermilk helps tenderize the meat, while cooking to the correct internal temperature keeps it from drying out.

    Letting the chicken rest after frying helps retain moisture.


    Variations You Can Try

    • Add more cayenne for spice
    • Use skinless chicken for a lighter version
    • Try air frying instead of deep frying


    Common Mistakes to Avoid

    • Frying at incorrect temperature
    • Not drying chicken before coating
    • Overcrowding the pan
    • Skipping resting time


    Make-Ahead and Storage Tips

    This southern fried chicken recipe can be prepared ahead.

    • Marinate chicken in advance
    • Store leftovers for up to 3 days

    Reheat in oven for best results.


    Final Thoughts

    This southern fried chicken recipe is a reliable option for making crispy and flavorful and juicy chicken at home with simple ingredients and easy steps


    Related Recipes You’ll Love

    If you enjoyed this recipe, try this Classic American Meatloaf Recipe next:

    – Classic American Meatloaf


    Explore More Chicken Dinner Recipes

    Discover more easy and flavorful chicken dinner ideas below:

    – Chicken Dinner Recipes


    Explore More Easy Dinner Recipes

    – Easy Dinner Recipes


    Author Note

    Dinners Recipe Team shares simple, reliable recipes designed for home cooks. Our goal is to make cooking easier while delivering flavorful, satisfying meals.

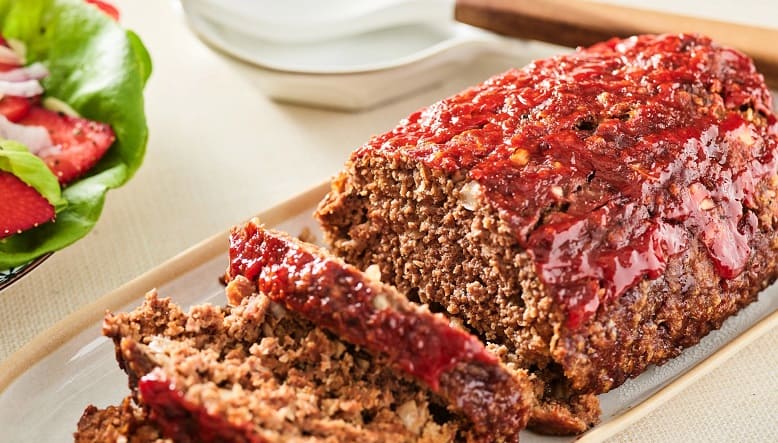
  • Classic American Meatloaf Recipe (Easy Family Dinner Favorite)

    Classic American Meatloaf Recipe (Easy Family Dinner Favorite)

    Meatloaf recipe is a classic comfort food made with ground meat, breadcrumbs, and simple seasonings, then baked until tender and flavorful. This easy meatloaf recipe is known for being juicy, budget-friendly, and perfect for weeknight dinners or meal prep.

    This meatloaf recipe focuses on keeping the texture moist while building flavor with simple ingredients you likely already have at home. The result is a balanced dish with a soft texture and a rich, savory taste.

    This dish is a staple in American comfort food and has remained popular for generations due to its simplicity and flavor. This version focuses on keeping the meatloaf moist while building flavor with simple ingredients you likely already have at home. The result is a balanced dish with a soft texture and a rich, savory taste.


    Table of Contents 

    • Ingredients
    • How to Make Meatloaf Recipe
    • Meatloaf Recipe Ingredient Tips
    • Variations
    • Serving Suggestions for Meatloaf Recipe
    • Frequently Asked Questions

    Why This Recipe Works

    • Breadcrumbs and egg help hold the mixture together
    • Milk adds moisture and prevents dryness
    • A simple glaze adds flavor without overpowering
    • Baking at the right temperature keeps the texture tender
    • This meatloaf recipe is designed to be simple while delivering consistent flavor and texture.

    Ingredients

    • 2 lbs ground beef (80/20 recommended)
    • 1 cup breadcrumbs
    • 1 onion, finely chopped
    • 3 cloves garlic, minced
    • 2 eggs
    • ½ cup milk
    • 2 tablespoons ketchup
    • 1 tablespoon Worcestershire sauce
    • Salt and pepper to taste

    For the Glaze

    • ¼ cup ketchup
    • 2 tablespoons brown sugar
    • 1 tablespoon mustard

    How to Make Meatloaf Recipe

    Step 1: Prepare the Mixture

    In a large bowl, combine ground beef, breadcrumbs, onion, garlic, eggs, milk, ketchup, Worcestershire sauce, salt, and pepper. Mix gently until just combined.

    Step 2: Shape

    Form the mixture into a loaf shape and place it in a baking dish or on a lined baking sheet.

    Step 3: Add Glaze

    Mix glaze ingredients and spread evenly over the top.

    Step 4: Bake

    Bake at 375°F (190°C) for 50–60 minutes, or until fully cooked.

    Step 5: Rest and Serve

    Let the meatloaf rest for 10 minutes before slicing.


    Meatloaf Recipe Ingredient Tips

    • Use ground beef with some fat (80/20) to keep the meatloaf moist
    • Fresh onion and garlic provide better flavor than powdered versions
    • Breadcrumbs help create a soft texture—panko can also be used
    • Milk is important for moisture, but broth can be used as a substitute

    Variations

    • Use a mix of beef and pork for a richer flavor
    • Add chopped vegetables like carrots or bell peppers for extra texture
    • Replace ketchup glaze with BBQ sauce for a different flavor profile
    • Use ground turkey for a lighter version, but add extra moisture

    Common Mistakes to Avoid

    • Overmixing the meat mixture can make the meatloaf dense
    • Skipping the resting time can cause the loaf to fall apart when slicing
    • Using lean meat only can result in a dry texture
    • Overcooking will make the meatloaf tough

    Serving Suggestions for Meatloaf Recipe

    This meatloaf recipe pairs well with a variety of sides, making it a flexible choice for different meals. Serve this meatloaf recipe with:

    • mashed potatoes
    • roasted vegetables
    • green beans
    • a simple salad

    It also works well for sandwiches the next day.


    Nutritional Information (Approx. per serving)

    Calories: 350–400 kcal
    Protein: 25–30g
    Carbohydrates: 15–20g
    Fat: 18–22g
    Sodium: Moderate


    Storage and Reheating

    This meatloaf recipe stores well and maintains its flavor when reheated properly.

    Store leftovers in an airtight container in the refrigerator for up to 3 days.

    To reheat:

    • use the oven or stovetop for best results
    • add a small amount of liquid to prevent drying

    You can also freeze cooked meatloaf for up to 2 months.


    Frequently Asked Questions

    Can I make meatloaf ahead of time?
    Yes, you can prepare the mixture in advance and refrigerate it before baking.

    How do I keep meatloaf from falling apart?
    Use enough binding ingredients like eggs and breadcrumbs, and allow it to rest before slicing.

    Can I make it without breadcrumbs?
    Yes, you can substitute oats or crushed crackers.

    How do I know when it’s done?
    The internal temperature should reach 160°F (71°C).

    Can I make mini meatloaves?
    Yes, divide into smaller portions and reduce cooking time.


    Best Meatloaf Texture Tips (Important for Success)

    Getting the right texture is one of the most important parts of making meatloaf. A good meatloaf should be tender, moist, and easy to slice without falling apart.

    To achieve this, it’s important to balance moisture and structure. Breadcrumbs and milk help create a softer texture, while eggs act as a binder to hold everything together. Using ground beef with some fat (such as 80/20) also prevents the meatloaf from becoming dry during baking.

    Another key factor is mixing. The ingredients should be combined just until evenly distributed. Overmixing compresses the meat and can result in a dense, tough texture instead of a light and tender one.


    Meatloaf Recipe Variations You Can Try

    One of the advantages of meatloaf is how easy it is to customize based on your preferences.

    For a richer flavor, you can use a combination of ground beef and pork. Adding finely chopped vegetables like carrots, celery, or bell peppers also enhances both flavor and texture.

    If you prefer a different glaze, barbecue sauce works well as a substitute for the traditional ketchup-based topping. You can also add a small amount of mustard or honey to adjust the sweetness and tanginess.

    For a lighter version, ground turkey can be used instead of beef, but you may need to add a bit more moisture to prevent dryness.


    How to Tell When Meatloaf is Fully Cooked

    The most reliable way to check doneness is by using a meat thermometer. The internal temperature should reach: 160°F (71°C)

    If you don’t have a thermometer, check that the juices run clear and the center is no longer pink.

    Avoid overcooking, as this can dry out the meatloaf. Once done, always let it rest before slicing. This allows the juices to redistribute and helps the meatloaf hold its shape.


    Make-Ahead and Meal Prep Tips

    Meatloaf is a great option for meal prep because it stores and reheats well.

    You can prepare the mixture ahead of time and refrigerate it for up to 24 hours before baking. This can even improve the flavor as the ingredients have more time to combine.

    Cooked meatloaf can be stored in the refrigerator for several days or frozen for longer storage. When reheating, adding a small amount of liquid or covering it can help maintain moisture.

    Leftovers are also excellent for sandwiches, making this a versatile dish beyond the initial meal.


    Final Thoughts

    This meatloaf recipe is one of the easiest ways to make a classic, satisfying dinner at home. This meatloaf recipe is a simple and reliable option for anyone looking to prepare a classic homemade meal. With the right balance of ingredients and proper cooking, it delivers a tender texture and satisfying flavor that works for both everyday meals and leftovers.

    This meatloaf recipe is simple to prepare and delivers consistent results every time. Whether you are new to cooking or experienced in the kitchen, this meatloaf recipe is a reliable option for a satisfying meal.


    Related Recipes You’ll Love

    If you enjoyed this classic American meatloaf recipe, try these popular dinner ideas next:

    – Orange Chicken
    – Southern Fried Chicken
    – Shrimp and Grits
    – Mongolian Beef


    Explore More Easy Dinner Recipes

    – Easy Dinner Recipes


    Author Note

    Dinners Recipe Team shares simple, reliable recipes designed for home cooks. Our goal is to make cooking easier while delivering flavorful, satisfying meals.