Category: North American

North American dinner recipes feature hearty comfort food, barbecue favorites, seafood classics, and regional dishes inspired by American and Canadian cooking traditions. This category includes sandwiches, chowders, smoked meats, roasted dinners, and classic family-style meals.

These recipes focus on rich flavor, practical preparation, and satisfying portions that work well for both casual meals and gatherings. From lobster rolls and clam chowder to pulled pork sandwiches and roast turkey dinners, each recipe highlights familiar comfort food with approachable cooking methods.

Whether you are looking for traditional comfort meals, barbecue-inspired dishes, or coastal seafood favorites, this category offers a wide variety of flavorful North American recipes for everyday cooking.

  • New England Baked Haddock Recipe

    New England Baked Haddock Recipe

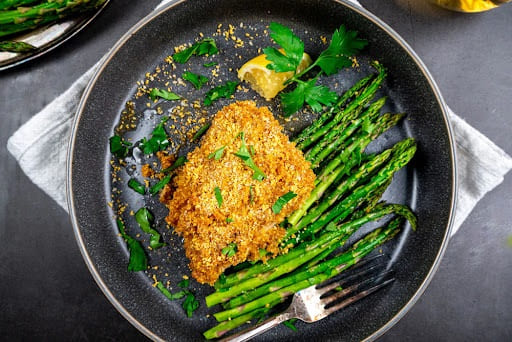
    New England baked haddock recipe is a classic coastal seafood dish made with flaky haddock fillets topped with buttery cracker crumbs and baked until golden. This New England cuisine delivers a light yet comforting meal with crisp texture and fresh seafood flavor.

    This New England baked haddock recipe focuses on keeping the fish moist while creating a rich, crunchy topping that complements the delicate haddock. It’s a dependable option for easy dinners, seafood meals, or traditional New England-style cooking.


    Table of Contents

    • Ingredients
    • How to Make New England Baked Haddock Recipe
    • Pro Tips for Best Results
    • Serving Suggestions for New England Baked Haddock
    • Nutritional Information
    • Frequently Asked Questions


    Why This New England Baked Haddock Recipe Works

    This New England baked haddock recipe is designed to create a balanced combination of texture and flavor.

    • Haddock stays moist while baking
    • Buttery cracker topping adds crispness
    • Lemon brightens the seafood flavor
    • Simple preparation keeps the dish reliable


    Ingredients

    For the Fish

    • 2 lbs haddock fillets
    • ½ teaspoon salt
    • ½ teaspoon black pepper
    • Juice of 1 lemon

    For the Topping

    • 1½ cups crushed Ritz crackers
    • ½ cup breadcrumbs (optional)
    • 6 tablespoons melted butter
    • 2 tablespoons chopped parsley
    • 1 teaspoon paprika
    • 1 teaspoon garlic powder (optional)

    For the Sauce

    • ½ cup whole milk or light cream
    • 2 tablespoons melted butter


    How to Make New England Baked Haddock Recipe

    Step 1: Prepare the Fish

    Preheat oven to 375°F (190°C).

    Pat haddock dry and place in a greased baking dish.

    Season with salt, pepper, and lemon juice.

    Step 2: Prepare the Topping

    Combine crushed crackers, breadcrumbs, butter, parsley, paprika, and garlic powder.

    Mix until crumbly.

    Step 3: Assemble the Dish

    Pour milk or cream around the fish.

    Top evenly with the cracker mixture.

    Drizzle with extra butter if desired.

    Step 4: Bake

    Bake for 20–25 minutes until fish flakes easily and topping becomes golden.

    Step 5: Broil (Optional)

    Broil briefly for extra crispness if needed.

    Step 6: Serve

    Serve hot with lemon wedges and side dishes.


    Pro Tips for Best Results

    • Pat fish dry before baking
    • Avoid overbaking haddock
    • Use fresh lemon juice for brightness
    • Watch carefully while broiling


    Serving Suggestions for New England Baked Haddock

    Serve with:

    • Mashed potatoes
    • Coleslaw
    • Roasted vegetables
    • Garden salad

    This New England baked haddock recipe pairs well with dishes like this Shrimp Gumbo Recipe for a balanced seafood-inspired meal.


    Nutritional Information (Approx. per serving)

    Calories: 300–350 kcal
    Protein: 25–30g
    Carbohydrates: 15–20g
    Fat: 12–18g
    Sodium: Moderate


    Storage and Reheating

    Store in the refrigerator for up to 2–3 days.

    For best results:

    • Reheat in the oven
    • Avoid microwaving to maintain crisp topping


    Frequently Asked Questions

    Can I use frozen haddock?

    Yes, but thaw and pat dry before baking.

    What fish can replace haddock?

    Cod, pollock, or tilapia can work as substitutes.


    How to Keep Baked Haddock Moist

    This New England baked haddock recipe depends on proper baking time and moisture control.

    Haddock is naturally lean and cooks quickly, so overcooking can dry it out. Adding milk or cream to the baking dish helps create steam and keeps the fish tender.

    Removing the fish once it flakes easily ensures the texture stays soft and delicate.

    Fresh lemon juice also helps brighten the flavor without overpowering the fish.


    How to Make the Perfect Buttery Cracker Topping

    The topping is one of the defining features of this New England baked haddock recipe.

    Using buttery crackers creates a crisp texture and rich flavor that pairs well with mild seafood. Mixing the crumbs with melted butter helps the topping brown evenly during baking.

    A small amount of breadcrumbs can be added for extra crunch, but the cracker topping should remain light rather than dense.

    Broiling briefly at the end can improve crispness without overcooking the fish.


    Variations You Can Try

    • Add Parmesan cheese to the topping
    • Use cod instead of haddock
    • Add herbs like dill or thyme
    • Make it lighter with olive oil instead of butter


    Common Mistakes to Avoid

    • Overbaking the fish
    • Using too much topping
    • Skipping lemon juice
    • Broiling too long


    Make-Ahead and Storage Tips

    This New England baked haddock recipe can be partially prepared ahead of time.

    • Assemble before baking
    • Refrigerate up to 8 hours before cooking
    • Reheat gently to maintain texture


    How to Turn This Into a Complete Meal

    This New England baked haddock recipe works well as the centerpiece of a balanced seafood dinner.

    Serve it with potatoes, vegetables, rice, or salad to create a complete meal. Lighter side dishes help balance the richness of the buttery topping.

    Adding fresh lemon wedges or herbs before serving can also improve presentation and flavor.


    Final Thoughts

    This New England baked haddock recipe is simple, comforting, and flavorful, making it a dependable seafood option for easy home cooking.


    Related Recipes You’ll Love

    – Shrimp Gumbo Recipe
    – New Orleans Jambalaya Recipe
    – Smoked Sausages with Beans Recipe


    Explore More Easy Dinner Recipes

    Discover more quick and simple meal ideas for any night:

    – Easy Dinner Recipes


    Author Note

    Dinners Recipe Team shares simple, reliable recipes designed for home cooks. Our goal is to make cooking easier while delivering flavorful, satisfying meals.

  • Crab Cakes Recipe

    Crab Cakes Recipe

    Crab cakes recipe is a classic seafood dish made with sweet crab meat, light seasoning, and a crisp golden exterior. This crab cakes recipe focuses on keeping the crab meat tender and flavorful while using just enough binder to hold the cakes together.

    This crab cakes recipe is perfect for appetizers, seafood dinners, sandwiches, or special occasions. With the right technique, you can create restaurant-style crab cakes at home with a crispy outside and soft, juicy center.


    Table of Contents

    • Ingredients
    • How to Make Crab Cakes Recipe
    • Pro Tips for Best Results
    • Serving Suggestions for Crab Cakes
    • Nutritional Information
    • Frequently Asked Questions


    Why This Crab Cakes Recipe Works

    This crab cakes recipe is designed to highlight the flavor and texture of real crab meat.

    • Minimal filler keeps crab flavor strong
    • Panko breadcrumbs create crisp texture
    • Chilling helps cakes hold together
    • Simple seasoning balances seafood flavor


    Ingredients

    For the Crab Cakes

    • 1 lb lump crab meat
    • ½ cup mayonnaise
    • 1 large egg
    • 1 teaspoon Dijon mustard
    • 1 teaspoon Worcestershire sauce
    • 1 teaspoon Old Bay seasoning
    • 1 teaspoon lemon juice
    • 2 tablespoons chopped parsley
    • ½ cup panko breadcrumbs
    • ¼ cup diced red bell pepper (optional)
    • 2 green onions, sliced
    • Salt and black pepper

    For Frying

    • 2–3 tablespoons butter
    • 2–3 tablespoons vegetable oil

    For Serving

    • Lemon wedges
    • Tartar sauce or remoulade


    How to Make Crab Cakes Recipe

    Step 1: Prepare the Crab Mixture

    Place crab meat in a large bowl and carefully remove any shell pieces.

    In another bowl, whisk together mayonnaise, egg, mustard, Worcestershire sauce, Old Bay seasoning, lemon juice, and parsley.

    Step 2: Combine Ingredients

    Pour the wet mixture over the crab meat.

    Fold in breadcrumbs, green onions, and bell pepper gently.

    Step 3: Form Crab Cakes

    Shape mixture into 6–8 patties.

    Refrigerate for at least 30 minutes.

    Step 4: Heat the Pan

    Heat butter and oil in a skillet over medium heat.

    Step 5: Cook the Crab Cakes

    Cook each crab cake for 3–4 minutes per side until golden brown and crisp.

    Step 6: Serve

    Serve warm with lemon wedges and sauce.


    Pro Tips for Best Results

    • Use lump crab meat for best texture
    • Avoid overmixing the crab mixture
    • Chill cakes before cooking
    • Flip carefully to prevent breaking


    Serving Suggestions for Crab Cakes

    Serve with:

    • Coleslaw
    • Salad
    • Roasted vegetables
    • Rice or potatoes

    This crab cakes recipe pairs well with dishes like this New England Baked Haddock Recipe for a seafood-inspired meal.


    Nutritional Information (Approx. per serving)

    Calories: 200–250 kcal
    Protein: 15–20g
    Carbohydrates: 8–12g
    Fat: 10–15g
    Sodium: Moderate


    Storage and Reheating

    Store in the refrigerator for up to 2–3 days.

    For best results:

    • Reheat in the oven or skillet
    • Avoid microwaving to preserve texture


    Frequently Asked Questions

    What crab meat is best for crab cakes?

    Lump crab meat or jumbo lump crab meat works best for texture and flavor.

    Can I bake crab cakes instead of frying?

    Yes, bake at 400°F (200°C) for about 15–18 minutes.


    How to Keep Crab Cakes From Falling Apart

    This crab cakes recipe depends on balancing moisture and binding ingredients properly.

    Using too much mayonnaise or too little breadcrumb can make the mixture too soft. Chilling the patties before cooking helps them firm up and maintain their shape.

    Handling the crab cakes gently while flipping also helps prevent breaking during cooking.

    Using large chunks of crab meat creates better texture and appearance.


    How to Get a Crispy Golden Exterior

    The key to this crab cakes recipe is proper pan temperature and breadcrumb texture.

    Panko breadcrumbs create a lighter, crispier coating compared to traditional breadcrumbs. Cooking over medium heat allows the exterior to brown evenly without burning.

    Using a combination of butter and oil improves flavor while helping the cakes crisp properly.

    Avoid overcrowding the pan so the crab cakes cook evenly.


    Variations You Can Try

    • Add Cajun seasoning for extra spice
    • Use fresh dill or chives
    • Bake instead of frying
    • Serve in sandwich buns


    Common Mistakes to Avoid

    • Overmixing the crab mixture
    • Using too much filler
    • Skipping refrigeration
    • Cooking at overly high heat


    Make-Ahead and Storage Tips

    This crab cakes recipe works well for preparing ahead of time.

    • Shape patties ahead and refrigerate
    • Freeze uncooked cakes up to 3 months
    • Reheat gently for best texture


    How to Turn This Into a Complete Meal

    This crab cakes recipe can easily become a full seafood dinner.

    Serve the crab cakes with salad, vegetables, rice, or potatoes for a balanced meal. Light sauces and lemon wedges complement the seafood flavor without overpowering it.

    This makes crab cakes suitable for both casual dinners and more elegant meals.


    Final Thoughts

    This crab cakes recipe is crispy, flavorful, and simple to prepare, making it a dependable seafood option for home cooking.


    Related Recipes You’ll Love

    – New England Baked Haddock Recipe
    – Shrimp Gumbo Recipe
    – New Orleans Jambalaya Recipe


    Explore More Easy Dinner Recipes

    Discover more quick and simple meal ideas for any night:

    – Easy Dinner Recipes


    Author Note

    Dinners Recipe Team shares simple, reliable recipes designed for home cooks. Our goal is to make cooking easier while delivering flavorful, satisfying meals.
  • Chicken Fried Steak Recipe – Crispy Southern Comfort Food

    Chicken Fried Steak Recipe – Crispy Southern Comfort Food

    Chicken fried steak recipe is a classic Southern comfort food made with tenderized beef steak coated in seasoned breading and fried until crispy and golden. This chicken fried steak recipe is traditionally served with creamy country gravy, creating a hearty and satisfying meal packed with rich flavor and crunchy texture.

    This chicken fried steak recipe is perfect for family dinners, weekend comfort meals, or anyone craving a classic Southern-style dish. With a crispy coating, juicy steak, and creamy gravy, it delivers the perfect balance of texture and flavor in every bite.


    Table of Contents

    • Ingredients
    • How to Make Chicken Fried Steak Recipe
    • Pro Tips for Best Results
    • Serving Suggestions for Chicken Fried Steak
    • Nutritional Information
    • Frequently Asked Questions


    Why This Chicken Fried Steak Recipe Works

    This chicken fried steak recipe is designed to create a crispy crust with tender, juicy steak inside.

    • Double dredging creates extra crispiness
    • Seasoned coating adds rich flavor
    • Proper frying temperature prevents sogginess
    • Homemade gravy adds classic Southern flavor


    Ingredients

    For the Steak

    • 4 cube steaks
    • 2 cups all-purpose flour
    • 1 teaspoon salt
    • 1 teaspoon black pepper
    • 1 teaspoon garlic powder
    • 1 teaspoon onion powder
    • 1 teaspoon paprika
    • ½ teaspoon cayenne pepper (optional)
    • 2 eggs
    • 1 cup milk or buttermilk
    • Oil for frying

    For the Gravy

    • 4 tablespoons pan drippings or butter
    • 4 tablespoons flour
    • 3–4 cups milk
    • Salt and black pepper to taste

    Optional Sides

    • Mashed potatoes
    • Green beans
    • Biscuits


    How to Make Chicken Fried Steak Recipe

    Step 1: Prepare the Steaks

    Pat cube steaks dry and season lightly with salt and pepper.

    Step 2: Set Up Dredging Station

    Mix flour and seasonings in one shallow bowl.

    Whisk eggs and milk together in another bowl.

    Step 3: Bread the Steaks

    Coat steaks in seasoned flour, dip in egg mixture, then coat again in flour.

    Let rest for 10 minutes before frying.

    Step 4: Fry the Steaks

    Heat oil to 350°F (175°C).

    Fry steaks for 3–4 minutes per side until golden brown and crispy.

    Drain on a wire rack or paper towels.

    Step 5: Make the Gravy

    Whisk flour into pan drippings and cook briefly.

    Slowly add milk while whisking continuously until thickened.

    Season with salt and black pepper.

    Step 6: Serve

    Serve steaks hot topped with gravy.


    Pro Tips for Best Results

    • Use cube steak for tenderness
    • Let breading rest before frying
    • Maintain steady oil temperature
    • Do not overcrowd the pan


    Serving Suggestions for Chicken Fried Steak

    Serve with:

    • Mashed potatoes
    • Biscuits
    • Green beans
    • Cornbread

    This chicken fried steak recipe pairs well with dishes like this Honey Glazed Ham Recipe for a comforting Southern-style dinner spread.


    Nutritional Information (Approx. per serving)

    Calories: 650–750 kcal
    Protein: 35–40g
    Carbohydrates: 40–50g
    Fat: 35–45g
    Sodium: High


    Storage and Reheating

    Store in the refrigerator for up to 3 days.

    For best results:

    • Reheat in the oven
    • Keep gravy separate until serving


    Frequently Asked Questions

    Why is it called chicken fried steak?

    The steak is breaded and fried using a method similar to fried chicken.

    Can I bake instead of fry?

    Yes, though the texture will be less crispy than traditional frying.


    How to Get a Crispy Coating

    This chicken fried steak recipe depends on proper breading and frying technique.

    Double dredging helps create a thicker crust that becomes crispy during frying. Allowing the breaded steaks to rest before cooking helps the coating stick better and reduces the risk of it falling off.

    Maintaining the oil temperature around 350°F ensures even browning without absorbing excess oil.


    How to Make Creamy Country Gravy

    This chicken fried steak recipe includes a classic white country gravy that complements the crispy steak.

    Using pan drippings adds flavor to the gravy base. Whisking flour into the drippings creates a roux that thickens the milk into a creamy sauce.

    Freshly cracked black pepper is essential for authentic country gravy flavor.


    Variations You Can Try

    • Use chicken instead of beef
    • Add hot sauce to the egg mixture
    • Use spicy seasoning blend
    • Serve with brown gravy instead


    Common Mistakes to Avoid

    • Frying at the wrong temperature
    • Skipping the resting step after breading
    • Overcrowding the pan
    • Under-seasoning the flour mixture


    Make-Ahead and Storage Tips

    This chicken fried steak recipe can be partially prepared ahead of time.

    • Bread steaks ahead of cooking
    • Refrigerate before frying
    • Store leftovers up to 3 days


    How to Turn This Into a Complete Meal

    This chicken fried steak recipe works perfectly as the centerpiece of a full Southern-style dinner.

    Serve it with mashed potatoes, vegetables, biscuits, or mac and cheese for a hearty comfort-food meal. Adding fresh vegetables or salad can help balance the richness of the fried steak and gravy.

    This also makes an excellent option for family-style dinners and weekend comfort meals.


    Final Thoughts

    This chicken fried steak recipe is crispy, flavorful, and deeply comforting, making it a classic Southern meal that’s always satisfying.


    Related Recipes You’ll Love

    – Honey Glazed Ham Recipe
    – Bacon Wrapped Meatloaf
    – Steak Burrito Bowl Recipe


    Explore More Chicken Dinner Recipes

    Discover more easy and flavorful chicken dinner ideas below:

    – Chicken Dinner Recipes


    Explore More Easy Dinner Recipes

    Discover more quick and simple meal ideas for any night:

    – Easy Dinner Recipes


    Author Note

    Dinners Recipe Team shares simple, reliable recipes designed for home cooks. Our goal is to make cooking easier while delivering flavorful, satisfying meals.
  • Chili Con Carne Recipe – Easy Hearty Beef Chili

    Chili Con Carne Recipe – Easy Hearty Beef Chili

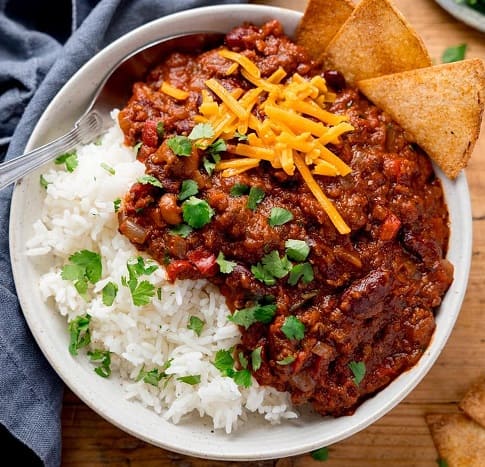
    Chili Con Carne recipe is a rich and hearty one-pot meal made with ground beef, beans, tomatoes, and bold spices simmered together until thick and flavorful. This chili con carne recipe focuses on simple ingredients and slow simmering to create deep flavor and a satisfying texture.

    This chili con carne recipe is perfect for weeknight dinners, meal prep, game days, or feeding a crowd. With tender beef, savory spices, and hearty beans, it delivers a comforting and reliable meal that tastes even better the next day.


    Table of Contents

    • Ingredients
    • How to Make Chili Con Carne Recipe
    • Pro Tips for Best Results
    • Serving Suggestions for Chili Con Carne
    • Nutritional Information
    • Frequently Asked Questions


    Why This Chili Con Carne Recipe Works

    This chili con carne recipe is designed to build rich flavor through slow cooking and balanced seasoning.

    • Slow simmering develops deeper flavor
    • Beans add texture and heartiness
    • Simple spices create balance
    • One-pot cooking keeps cleanup easy


    Ingredients

    • 2 tablespoons olive oil
    • 2 lbs ground beef
    • 1 onion, chopped
    • 4 cloves garlic, minced
    • 2 bell peppers, chopped
    • 2 cans diced tomatoes
    • 1 can tomato paste
    • 1½ cups beef stock
    • 2 cans kidney beans, drained
    • 1 can black beans (optional)

    Spices

    • 3 tablespoons chili powder
    • 2 teaspoons cumin
    • 1 teaspoon smoked paprika
    • 1 teaspoon oregano
    • Salt and pepper to taste


    How to Make Chili Con Carne Recipe

    Step 1: Cook Vegetables

    Heat olive oil in a large pot.

    Cook onion and bell peppers until softened. Add garlic and cook briefly.

    Step 2: Brown Beef

    Add ground beef and cook until browned.

    Drain excess fat if needed.

    Step 3: Add the Base

    Stir in spices, diced tomatoes, tomato paste, and beef stock.

    Mix well.

    Step 4: Simmer

    Bring to a gentle simmer and cook uncovered for about 45 minutes, stirring occasionally.

    Step 5: Add Beans

    Add kidney beans and black beans.

    Continue simmering until the chili thickens.

    Step 6: Serve

    Serve hot with your favorite toppings and sides.


    Pro Tips for Best Results

    • Simmer uncovered for thicker chili
    • Taste and adjust seasoning gradually
    • Let chili rest before serving
    • Use quality chili powder for better flavor


    Serving Suggestions for Chili Con Carne

    Serve with:

    • Cornbread
    • Rice
    • Tortilla chips
    • Sour cream

    This chili con carne recipe pairs well with dishes like this Steak Burrito Bowl Recipe for a bold Tex-Mex style meal.


    Nutritional Information (Approx. per serving)

    Calories: 450–550 kcal
    Protein: 30–35g
    Carbohydrates: 25–35g
    Fat: 20–30g
    Fiber: High


    Storage and Reheating

    Store in the refrigerator for up to 4 days.

    For best results:

    • Reheat slowly on the stove
    • Add broth or water if too thick


    Frequently Asked Questions

    Can I skip the beans?

    Yes, you can replace the beans with additional meat if preferred.

    How do I thicken chili?

    Simmer uncovered longer or mash some of the beans into the chili.


    How to Build Deep Chili Flavor

    This chili con carne recipe develops flavor through layering ingredients properly.

    Cooking onions, peppers, and garlic first creates a flavorful base. Browning the beef thoroughly adds richness and depth that carries throughout the dish.

    Toasting the spices briefly before simmering enhances their aroma and creates a more balanced flavor profile.

    Allowing the chili to simmer slowly gives the ingredients time to fully combine into a rich and hearty dish.


    How to Control Thickness and Texture

    This chili con carne recipe can be adjusted depending on your preferred consistency.

    For thicker chili, simmer uncovered to reduce excess liquid naturally. Mashing a small amount of beans into the chili also helps thicken it without additional ingredients.

    If the chili becomes too thick, simply add more broth or water until the desired texture is reached.

    Balancing simmer time and liquid levels is key to achieving the perfect consistency.


    Variations You Can Try

    • Use ground turkey instead of beef
    • Add jalapeños for extra heat
    • Use chunks of beef instead of ground meat
    • Add corn or extra vegetables


    Common Mistakes to Avoid

    • Rushing the simmering process
    • Using too much liquid
    • Under-seasoning the chili
    • Overcooking the beans


    Make-Ahead and Storage Tips

    This chili con carne recipe is excellent for meal prep and leftovers.

    • Make a day ahead for deeper flavor
    • Store leftovers up to 4 days
    • Freeze up to 3 months


    How to Turn This Into a Complete Meal

    This chili con carne recipe can easily become a full comfort-food dinner.

    Serve it with cornbread, rice, chips, or baked potatoes for a more filling meal. Toppings like cheese, sour cream, avocado, and fresh herbs can also add extra texture and flavor.

    This makes it ideal for gatherings, meal prep, or casual family dinners.


    Final Thoughts

    This chili con carne recipe is hearty, flavorful, and easy to prepare, making it a dependable option for both quick dinners and large-batch cooking.


    Related Recipes You’ll Love

    – Steak Burrito Bowl Recipe
    – Spicy Chicken Nachos Recipe
    – Smoked Sausages with Beans Recipe


    Explore More Easy Dinner Recipes

    Discover more quick and simple meal ideas for any night:

    – Easy Dinner Recipes


    Author Note

    Dinners Recipe Team shares simple, reliable recipes designed for home cooks. Our goal is to make cooking easier while delivering flavorful, satisfying meals.
  • Bacon Wrapped Meatloaf Recipe – Juicy, Crispy, Flavorful Classic

    Bacon Wrapped Meatloaf Recipe – Juicy, Crispy, Flavorful Classic

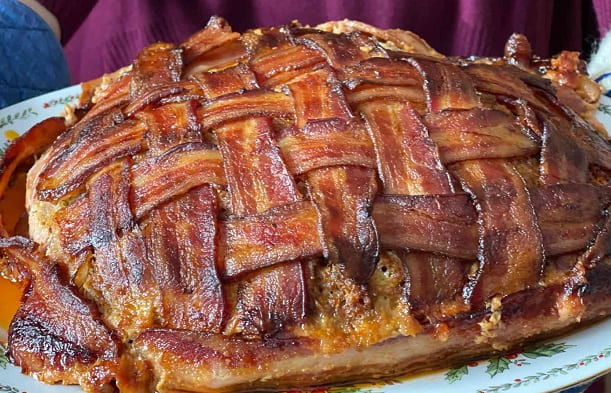
    Bacon wrapped meatloaf recipe is a rich and comforting dish made with seasoned ground meat wrapped in crispy bacon and finished with a sweet and tangy glaze. This bacon wrapped meatloaf recipe delivers a perfect balance of smoky flavor, tender texture, and a caramelized exterior that makes it a reliable choice for family dinners.

    This bacon wrapped meatloaf recipe focuses on proper meat balance, moisture retention, and controlled baking to ensure the inside stays juicy while the bacon crisps on the outside. It’s a simple, dependable recipe that pairs well with classic comfort food sides.


    Table of Contents

    • Ingredients
    • How to Make Bacon Wrapped Meatloaf Recipe
    • Pro Tips for Best Results
    • Serving Suggestions for Bacon Wrapped Meatloaf
    • Nutritional Information
    • Frequently Asked Questions


    Why This Bacon Wrapped Meatloaf Recipe Works

    This bacon wrapped meatloaf recipe is designed for consistent results and strong flavor.

    • Bacon locks in moisture during cooking
    • Beef and pork create a juicy texture
    • Panade (milk + breadcrumbs) keeps meat tender
    • Glaze adds a sweet and tangy finish


    Ingredients

    For the Meatloaf

    • 2 lbs (900 g) ground beef (80/20 blend)
    • ½ lb (225 g) ground pork (optional)
    • 1 medium onion, finely chopped
    • 3 cloves garlic, minced
    • 1 cup breadcrumbs
    • ¾ cup whole milk
    • 2 large eggs
    • ½ cup Parmesan cheese, grated
    • 2 tbsp parsley, chopped
    • 1 tbsp Worcestershire sauce
    • 1 tsp smoked paprika
    • 1 tsp salt
    • ½ tsp black pepper

    For the Bacon Wrap

    • 12–14 slices thick-cut bacon

    For the Glaze

    • ½ cup ketchup
    • 2 tbsp brown sugar
    • 1 tbsp apple cider vinegar
    • 1 tsp mustard


    How to Make Bacon Wrapped Meatloaf Recipe

    Step 1: Prepare the Mixture

    Preheat oven to 375°F (190°C).
    Mix breadcrumbs and milk, let sit 5 minutes.
    Add beef, pork, eggs, onion, garlic, Parmesan, parsley, Worcestershire, and seasoning.
    Mix gently until combined.

    Step 2: Shape

    Place mixture on a lined baking sheet and shape into a loaf.

    Step 3: Wrap

    Lay bacon strips overlapping and wrap around the meatloaf. Tuck ends underneath.

    Step 4: Prepare Glaze

    Mix ketchup, brown sugar, vinegar, and mustard.
    Brush half over the meatloaf.

    Step 5: Bake

    Bake for 45 minutes.
    Remove, apply remaining glaze, and bake another 20–30 minutes.
    Internal temperature: 160°F (71°C).
    Optional: broil 2–3 minutes for crisp bacon.

    Step 6: Rest and Serve

    Rest for 10 minutes before slicing. Serve warm.


    Pro Tips for Best Results

    • Do not overmix the meat to avoid a dense texture
    • Use 80/20 beef for proper moisture
    • Soaking breadcrumbs improves tenderness
    • Let meatloaf rest before slicing
    • Use a rack or free-form loaf for even cooking


    Serving Suggestions for Bacon Wrapped Meatloaf

    Serve with:

    • Mashed potatoes
    • Roasted vegetables
    • Green beans
    • Mac and cheese

    This bacon wrapped meatloaf recipe pairs well with dishes like this Classic American Meatloaf Recipe for a full comfort-style meal.


    Nutritional Information (Approx. per serving)

    Calories: 520 kcal
    Protein: 34g
    Carbohydrates: 16g
    Fat: 36g
    Fiber: 1g
    Sodium: Moderate


    Storage and Reheating

    Store in the refrigerator for up to 3–4 days.

    For best results:

    • Reheat in the oven
    • Cover with foil to retain moisture
    • Avoid microwaving for best texture


    Frequently Asked Questions

    Can I use turkey instead of beef?

    Yes, but the texture will be leaner. Bacon helps retain moisture.

    How do I keep meatloaf from falling apart?

    Use proper binders (egg + breadcrumbs) and let it rest before slicing.

    Can I freeze this?

    Yes, freeze before baking and thaw overnight before cooking.

    How do I reheat leftovers?

    Reheat in the oven at 350°F (175°C) for about 15 minutes.


    How to Get a Crispy Bacon Exterior

    This bacon wrapped meatloaf recipe depends on proper heat and airflow.

    Using a free-form loaf allows hot air to circulate, helping the bacon crisp evenly. Finishing under the broiler adds extra crispness without overcooking the inside.


    How to Keep Meatloaf Juicy Inside

    The key to this bacon wrapped meatloaf recipe is moisture balance.

    Using a panade (milk and breadcrumbs) prevents dryness, while the bacon layer protects the meat during baking. Cooking to the correct internal temperature ensures the meat stays tender.


    Variations You Can Try

    • Use BBQ sauce instead of glaze
    • Add chili flakes for heat
    • Use ground turkey or chicken
    • Add shredded cheese inside


    Common Mistakes to Avoid

    • Overmixing the meat
    • Using very lean meat
    • Skipping the resting step
    • Not checking internal temperature


    Make-Ahead and Storage Tips

    This bacon wrapped meatloaf recipe works well for meal prep.

    • Assemble ahead and refrigerate overnight
    • Store cooked meatloaf up to 4 days
    • Freeze for longer storage


    How to Turn This Into a Complete Meal

    This bacon wrapped meatloaf recipe pairs well with classic comfort sides.

    Serving it with mashed potatoes and vegetables creates a balanced plate, while adding a salad helps cut through the richness.


    Final Thoughts

    This bacon wrapped meatloaf recipe is juicy, flavorful, and reliable, making it a strong option for both everyday meals and special occasions.


    Related Recipes You’ll Love

    – Classic American Meatloaf
    – Southern Fried Chicken
    – Shrimp and Grits


    Explore More Dinner Recipes

    Discover more easy and satisfying meals below:

    – Easy Dinner Recipes


    Author Note

    Dinners Recipe Team shares simple, reliable recipes designed for home cooks. Our goal is to make cooking easier while delivering flavorful, satisfying meals.

  • Maple Glazed Salmon Recipe – 7 Easy Tips for Sweet and Flavorful Salmon

    Maple Glazed Salmon Recipe – 7 Easy Tips for Sweet and Flavorful Salmon

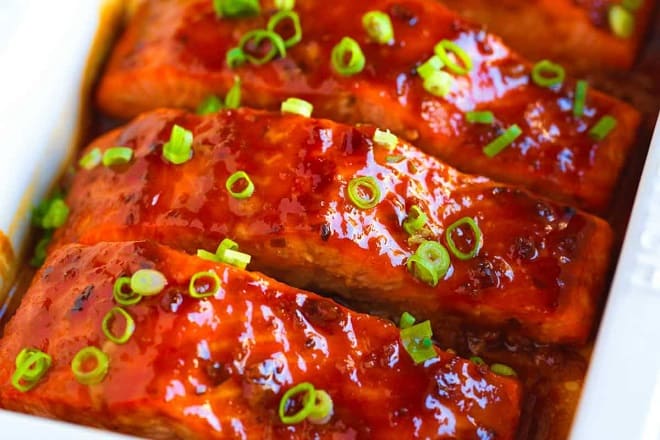
    Maple glazed salmon recipe is a simple and flavorful seafood dish made with tender salmon fillets coated in a sweet and savory maple glaze. This maple glazed salmon recipe creates a rich caramelized finish while keeping the salmon moist and flaky inside.

    This maple glazed salmon recipe is ideal for weeknight dinners, meal prep, or elegant seafood meals. With minimal ingredients and quick cooking time, it delivers restaurant-style flavor with very little effort.


    Table of Contents

    • Ingredients
    • How to Make Maple Glazed Salmon Recipe
    • Pro Tips for Best Results
    • Serving Suggestions for Maple Glazed Salmon
    • Nutritional Information
    • Frequently Asked Questions


    Why This Maple Glazed Salmon Recipe Works

    This maple glazed salmon recipe is designed to balance sweetness, richness, and savory flavor.

    • Maple syrup creates caramelized glaze
    • Salmon stays moist and tender
    • Simple ingredients build balanced flavor
    • Quick cooking keeps preparation easy


    Ingredients

    For the Salmon

    • 4 salmon fillets
    • ½ teaspoon salt
    • ½ teaspoon black pepper
    • 1 tablespoon olive oil

    For the Maple Glaze

    • ⅓ cup pure maple syrup
    • 2 tablespoons soy sauce
    • 1 tablespoon Dijon mustard
    • 2 cloves garlic, minced
    • 1 tablespoon lemon juice
    • ½ teaspoon red pepper flakes (optional)

    Optional Garnish

    • Fresh parsley or chives
    • Lemon wedges


    How to Make Maple Glazed Salmon Recipe

    Step 1: Prepare the Salmon

    Pat salmon fillets dry and season with salt and pepper.

    Brush lightly with olive oil.

    Step 2: Make the Glaze

    Whisk together maple syrup, soy sauce, mustard, garlic, lemon juice, and red pepper flakes.

    Reserve a small amount for serving.

    Step 3: Preheat Oven

    Preheat oven to 400°F (200°C).

    Step 4: Glaze the Salmon

    Place salmon skin-side down on a baking sheet and brush generously with glaze.

    Step 5: Bake

    Bake for 12–15 minutes until salmon flakes easily with a fork.

    Broil briefly at the end for caramelization if desired.

    Step 6: Serve

    Brush with reserved glaze and garnish before serving.


    Pro Tips for Best Results

    • Use pure maple syrup for best flavor
    • Avoid overcooking salmon
    • Pat salmon dry before seasoning
    • Broil briefly for caramelized glaze


    Serving Suggestions for Maple Glazed Salmon

    Serve with:

    • Rice
    • Roasted vegetables
    • Salad
    • Potatoes or quinoa

    This maple glazed salmon recipe pairs well with dishes like this New England Baked Haddock Recipe for a balanced seafood meal.


    Nutritional Information (Approx. per serving)

    Calories: 350–400 kcal
    Protein: 30–35g
    Carbohydrates: 10–15g
    Fat: 18–22g
    Omega-3: High


    Storage and Reheating

    Store in the refrigerator for up to 2–3 days.

    For best results:

    • Reheat gently in the oven
    • Avoid overheating to prevent dryness


    Frequently Asked Questions

    Can I use frozen salmon?

    Yes, thaw completely and pat dry before cooking.

    What type of maple syrup works best?

    Pure maple syrup provides the best flavor and caramelization.


    How to Keep Salmon Moist and Flaky

    This maple glazed salmon recipe depends on proper cooking time and temperature.

    Salmon can dry out quickly if overcooked. Baking at moderate heat and removing the fish once it flakes easily helps preserve moisture.

    Allowing the glaze to caramelize gently adds flavor without drying the salmon.

    Using thicker salmon fillets also helps maintain tenderness during cooking.


    How to Create a Balanced Maple Glaze

    The key to this maple glazed salmon recipe is balancing sweet and savory flavors.

    Maple syrup provides sweetness while soy sauce and mustard add depth and acidity. Garlic and lemon juice help brighten the flavor profile.

    Cooking the glaze at the right temperature allows it to thicken slightly and coat the salmon evenly.

    Avoid using pancake syrup, which lacks the depth and texture of real maple syrup.


    Variations You Can Try

    • Add ginger for extra warmth
    • Use orange juice instead of lemon
    • Add sriracha for heat
    • Grill instead of baking


    Common Mistakes to Avoid

    • Overcooking salmon
    • Using artificial syrup
    • Skipping the glaze reserve
    • Cooking at overly high heat


    Make-Ahead and Storage Tips

    This maple glazed salmon recipe works well for meal prep.

    • Marinate salmon briefly before cooking
    • Store leftovers up to 3 days
    • Reheat gently for best texture


    How to Turn This Into a Complete Meal

    This maple glazed salmon recipe can easily become a balanced dinner.

    Serve it with rice, potatoes, or vegetables to create a complete plate. Fresh greens or roasted vegetables help balance the richness of the salmon and glaze.

    This makes it suitable for both casual dinners and more elegant meals.


    Final Thoughts

    This maple glazed salmon recipe is quick, flavorful, and reliable, making it an excellent option for easy seafood dinners.


    Related Recipes You’ll Love

    – New England Baked Haddock Recipe
    – Crab Cakes Recipe
    – Shrimp Gumbo Recipe


    Explore More Easy Dinner Recipes

    Discover more quick and simple meal ideas for any night:

    – Easy Dinner Recipes


    Author Note

    Dinners Recipe Team shares simple, reliable recipes designed for home cooks. Our goal is to make cooking easier while delivering flavorful, satisfying meals.

  • Clam Chowder with Bacon Recipe – 7 Easy Tips for Creamy Seafood Chowder

    Clam Chowder with Bacon Recipe – 7 Easy Tips for Creamy Seafood Chowder

    Clam chowder with bacon recipe is a rich and comforting seafood soup made with tender clams, potatoes, cream, and smoky bacon. This clam chowder with bacon recipe combines creamy texture with savory flavor, creating a hearty dish perfect for colder weather or comforting family meals.

    This clam chowder with bacon recipe is inspired by classic New England chowder and focuses on balanced flavor, smooth texture, and simple preparation. The addition of bacon adds depth and richness while complementing the sweetness of the clams.


    Table of Contents

    • Ingredients
    • How to Make Clam Chowder with Bacon Recipe
    • Pro Tips for Best Results
    • Serving Suggestions for Clam Chowder with Bacon
    • Nutritional Information
    • Frequently Asked Questions


    Why This Clam Chowder with Bacon Recipe Works

    This clam chowder with bacon recipe is designed to create a creamy and flavorful result.

    • Bacon adds smoky depth
    • Clams provide rich seafood flavor
    • Potatoes naturally thicken the chowder
    • Cream creates smooth texture


    Ingredients

    Base

    • 6 slices bacon, diced
    • 2 tablespoons butter
    • 1 onion, diced
    • 2 celery stalks, diced
    • 2 carrots, diced
    • 3 cloves garlic, minced

    For the Chowder

    • 4 potatoes, diced
    • 3 cups clam juice
    • 1 cup chicken or seafood stock
    • 2 cups heavy cream or half-and-half
    • 2 bay leaves
    • 1 teaspoon thyme
    • ½ teaspoon paprika
    • Salt and black pepper

    For the Clams

    • 3 cans chopped clams with liquid reserved

    Optional Garnish

    • Fresh parsley or chives
    • Crumbled bacon
    • Oyster crackers or bread


    How to Make Clam Chowder with Bacon Recipe

    Step 1: Cook the Bacon

    Cook diced bacon in a large pot until crispy.

    Remove bacon and reserve some fat in the pot.

    Step 2: Sauté Vegetables

    Add butter, onion, celery, and carrots.

    Cook until softened, then add garlic.

    Step 3: Cook the Potatoes

    Add potatoes, clam juice, stock, bay leaves, thyme, paprika, salt, and pepper.

    Simmer until potatoes are tender.

    Step 4: Add Clams and Cream

    Stir in chopped clams and reserved clam liquid.

    Reduce heat and add cream gently.

    Step 5: Simmer

    Cook gently for several minutes without boiling.

    Step 6: Serve

    Remove bay leaves and serve hot with bacon garnish and crackers.


    Pro Tips for Best Results

    • Do not boil after adding cream
    • Use thick-cut bacon for better texture
    • Simmer slowly for deeper flavor
    • Mash a few potatoes for thicker chowder


    Serving Suggestions for Clam Chowder with Bacon

    Serve with:

    • Oyster crackers
    • Crusty bread
    • Salad
    • Seafood sides

    This clam chowder with bacon recipe pairs well with dishes like this Crab Cakes Recipe for a complete seafood meal.


    Nutritional Information (Approx. per serving)

    Calories: 400–450 kcal
    Protein: 15–20g
    Carbohydrates: 25–30g
    Fat: 22–28g
    Sodium: Moderate to high


    Storage and Reheating

    Store in the refrigerator for up to 3 days.

    For best results:

    • Reheat gently on low heat
    • Avoid boiling after reheating


    Frequently Asked Questions

    Can I use fresh clams instead of canned?

    Yes, fresh clams provide excellent flavor and texture.

    How do I make the chowder thicker?

    Mash some potatoes or simmer uncovered longer.


    How to Build Rich Chowder Flavor

    This clam chowder with bacon recipe depends on layering flavor properly.

    Cooking bacon first creates a flavorful base that enhances the entire soup. Sautéing vegetables in the rendered fat adds depth and richness.

    Using clam juice instead of plain water strengthens the seafood flavor while maintaining balance.

    Allowing the chowder to simmer slowly helps all the ingredients blend together into a smooth and comforting dish.


    How to Keep Chowder Creamy and Smooth

    The key to this clam chowder with bacon recipe is gentle cooking after adding dairy.

    Boiling cream can cause separation and affect texture. Keeping the heat low preserves a smooth consistency.

    Potatoes naturally help thicken the chowder as they cook. Lightly mashing some of them creates additional body without needing flour.

    Adding cream near the end of cooking also helps maintain freshness and richness.


    Variations You Can Try

    • Use fresh clams instead of canned
    • Add corn for sweetness
    • Use smoked pancetta instead of bacon
    • Add extra herbs for more flavor


    Common Mistakes to Avoid

    • Boiling after adding cream
    • Overcooking clams
    • Using too much salt early
    • Not simmering long enough


    Make-Ahead and Storage Tips

    This clam chowder with bacon recipe works well for leftovers.

    • Store refrigerated up to 3 days
    • Reheat slowly for best texture
    • Stir gently during reheating


    How to Turn This Into a Complete Meal

    This clam chowder with bacon recipe can easily become a full seafood dinner.

    Serve it with crusty bread, salad, or seafood appetizers for a balanced meal. Oyster crackers or toasted bread add texture while helping soak up the creamy broth.

    This makes it ideal for casual dinners, colder weather meals, or seafood-themed gatherings.


    Final Thoughts

    This clam chowder with bacon recipe is creamy, comforting, and full of rich seafood flavor, making it a dependable choice for hearty homemade meals.


    Related Recipes You’ll Love

    – Crab Cakes Recipe
    – New England Baked Haddock Recipe
    – Maple Glazed Salmon Recipe


    Explore More Easy Dinner Recipes

    Discover more quick and simple meal ideas for any night:

    – Easy Dinner Recipes


    Author Note

    Dinners Recipe Team shares simple, reliable recipes designed for home cooks. Our goal is to make cooking easier while delivering flavorful, satisfying meals.
  • Lobster Roll Recipe – 7 Easy Tips for Classic New England Lobster Rolls

    Lobster Roll Recipe – 7 Easy Tips for Classic New England Lobster Rolls

    Lobster roll recipe is a classic New England seafood sandwich made with tender lobster meat served in a buttery toasted bun. This lobster roll recipe combines sweet lobster, light seasoning, and soft toasted rolls for a simple but flavorful coastal dish.

    This lobster roll recipe focuses on keeping the lobster as the main highlight while balancing texture and flavor with a creamy dressing and buttery bread. It works well for summer meals, seafood dinners, or casual entertaining.


    Table of Contents

    • Ingredients
    • How to Make Lobster Roll Recipe
    • Pro Tips for Best Results
    • Serving Suggestions for Lobster Rolls
    • Nutritional Information
    • Frequently Asked Questions


    Why This Lobster Roll Recipe Works

    This lobster roll recipe is designed to create a balanced and flavorful seafood sandwich.

    • Lobster remains the main flavor
    • Light dressing prevents heaviness
    • Toasted buns add texture
    • Simple ingredients keep preparation easy


    Ingredients

    For the Lobster Filling

    • 1½ lbs cooked lobster meat
    • 3 tablespoons mayonnaise
    • 1 tablespoon lemon juice
    • 1 teaspoon lemon zest
    • 1 celery stalk, finely diced
    • 1 tablespoon fresh chives
    • ½ teaspoon salt
    • ¼ teaspoon black pepper

    For the Rolls

    • 4 split-top hot dog buns
    • 3 tablespoons melted butter

    Optional Garnish

    • Fresh parsley or chives


    How to Make Lobster Roll Recipe

    Step 1: Prepare the Lobster

    Remove lobster meat from shells and cut into bite-sized pieces.

    Pat dry gently.

    Step 2: Make the Filling

    Combine mayonnaise, lemon juice, lemon zest, celery, chives, salt, and pepper.

    Fold in lobster meat carefully.

    Step 3: Chill

    Refrigerate the lobster mixture briefly before serving.

    Step 4: Toast the Rolls

    Brush buns with melted butter and toast until golden brown.

    Step 5: Fill the Rolls

    Spoon lobster mixture into the toasted buns.

    Step 6: Serve

    Serve immediately while rolls are warm.


    Pro Tips for Best Results

    • Use fresh lobster when possible
    • Do not overmix the lobster filling
    • Toast buns evenly for best texture
    • Avoid using too much mayonnaise


    Serving Suggestions for Lobster Rolls

    Serve with:

    • Potato chips
    • French fries
    • Coleslaw
    • Salad

    This lobster roll recipe pairs well with dishes like this Clam Chowder with Bacon Recipe for a complete seafood meal.


    Nutritional Information (Approx. per serving)

    Calories: 400–450 kcal
    Protein: 25–30g
    Carbohydrates: 20–30g
    Fat: 20–25g
    Sodium: Moderate


    Storage and Reheating

    Store lobster filling separately in the refrigerator for up to 2 days.

    For best results:

    • Toast buns fresh before serving
    • Avoid freezing assembled rolls


    Frequently Asked Questions

    Can I use frozen lobster meat?

    Yes, thaw completely and pat dry before using.

    What is the difference between Maine and Connecticut lobster rolls?

    Maine-style uses mayonnaise while Connecticut-style uses warm butter.


    How to Keep Lobster Rolls Light and Flavorful

    This lobster roll recipe works best when the lobster remains the focus.

    Using only a small amount of dressing allows the natural sweetness of the lobster to stand out. Lemon juice and fresh herbs help brighten the flavor without overpowering it.

    Avoid adding too many extra ingredients, which can make the filling heavy or mask the seafood flavor.

    Keeping the filling chilled also improves texture and freshness.


    How to Toast the Perfect Roll

    The key to this lobster roll recipe is balancing soft bread with a crisp buttery exterior.

    Split-top buns are ideal because they hold the filling well and toast evenly. Brushing the outside with butter before toasting creates a golden crust and enhances flavor.

    Cooking the buns over medium heat prevents burning while allowing them to become crisp on the outside and soft inside.

    Freshly toasted rolls provide the best overall texture.


    Variations You Can Try

    • Make Connecticut-style with warm butter
    • Add Old Bay seasoning
    • Use crab instead of lobster
    • Add fresh dill or scallions


    Common Mistakes to Avoid

    • Using too much mayonnaise
    • Overmixing lobster meat
    • Serving on untoasted buns
    • Overcooking fresh lobster


    Make-Ahead and Storage Tips

    This lobster roll recipe can be partially prepared ahead.

    • Make lobster filling in advance
    • Store chilled up to 2 days
    • Toast buns just before serving


    How to Turn This Into a Complete Meal

    This lobster roll recipe can easily become a full seafood dinner.

    Serve it with chowder, salad, fries, or seafood appetizers for a balanced meal. Light side dishes help complement the richness of the lobster without overpowering it.

    This makes lobster rolls suitable for casual lunches, summer dinners, or seafood gatherings.


    Final Thoughts

    This lobster roll recipe is simple, flavorful, and perfect for creating classic New England-style seafood sandwiches at home.


    Related Recipes You’ll Love

    – Clam Chowder with Bacon Recipe
    – Crab Cakes Recipe
    – New England Baked Haddock Recipe
    – Fish Tacos


    Explore More Easy Dinner Recipes

    Discover more quick and simple meal ideas for any night:

    – Easy Dinner Recipes


    Author Note

    Dinners Recipe Team shares simple, reliable recipes designed for home cooks. Our goal is to make cooking easier while delivering flavorful, satisfying meals.
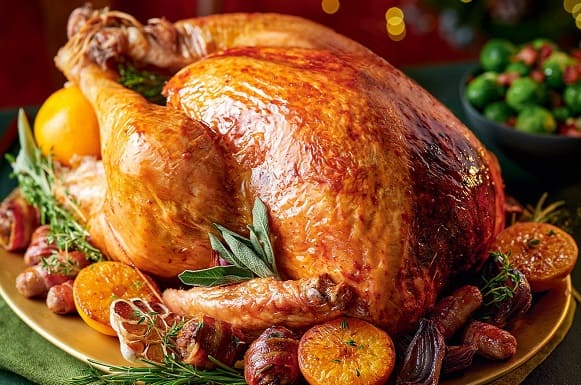
  • Turkey Roast with Gravy Recipe – 7 Easy Tips for Juicy Holiday Turkey

    Turkey Roast with Gravy Recipe – 7 Easy Tips for Juicy Holiday Turkey

    Turkey roast with gravy recipe is a classic holiday meal made with tender roasted turkey and rich homemade gravy. This turkey roast with gravy recipe creates juicy meat, crispy golden skin, and flavorful pan gravy that pairs perfectly with traditional side dishes.

    This turkey roast with gravy recipe is ideal for Thanksgiving, Christmas, family gatherings, or special dinners. Using proper seasoning, roasting technique, and resting time helps create a flavorful and reliable result.


    Table of Contents

    • Ingredients
    • How to Make Turkey Roast with Gravy Recipe
    • Pro Tips for Best Results
    • Serving Suggestions for Turkey Roast with Gravy
    • Nutritional Information
    • Frequently Asked Questions


    Why This Turkey Roast with Gravy Recipe Works

    This turkey roast with gravy recipe is designed to keep the turkey moist while building rich flavor.

    • Butter seasoning adds moisture
    • Slow roasting keeps turkey tender
    • Pan drippings create flavorful gravy
    • Resting improves texture and juiciness


    Ingredients

    For the Turkey

    • 1 whole turkey (10–12 lbs)
    • ½ cup butter, softened
    • 2 tablespoons olive oil
    • 1 tablespoon salt
    • 2 teaspoons black pepper
    • 2 teaspoons paprika
    • 2 teaspoons garlic powder
    • 1 teaspoon onion powder
    • 2 teaspoons thyme
    • 2 teaspoons rosemary
    • 2 teaspoons sage

    Aromatics

    • 1 onion, quartered
    • 1 lemon, halved
    • 1 head garlic, halved
    • Fresh rosemary and thyme sprigs

    For the Gravy

    • 4 cups turkey or chicken stock
    • 4 tablespoons turkey drippings
    • 4 tablespoons flour
    • Salt and pepper


    How to Make Turkey Roast with Gravy Recipe

    Step 1: Prepare the Turkey

    Remove giblets and pat turkey dry thoroughly.

    Tuck wings under and tie legs with kitchen twine.

    Step 2: Season the Turkey

    Mix butter, oil, and seasonings into a paste.

    Rub under the skin and over the outside of the turkey.

    Fill cavity with onion, lemon, garlic, and herbs.

    Step 3: Preheat Oven

    Preheat oven to 325°F (165°C).

    Step 4: Roast the Turkey

    Place turkey breast-side up on a roasting rack.

    Roast about 15 minutes per pound, basting occasionally.

    Cook until internal temperature reaches 165°F (74°C).

    Step 5: Rest the Turkey

    Let turkey rest 20–30 minutes before carving.

    Step 6: Make the Gravy

    Whisk flour into turkey drippings to form a roux.

    Slowly add stock and simmer until thickened.

    Step 7: Serve

    Slice turkey and serve with warm gravy.


    Pro Tips for Best Results

    • Pat turkey dry before seasoning
    • Use a meat thermometer for accuracy
    • Let turkey rest before carving
    • Baste occasionally for even browning


    Serving Suggestions for Turkey Roast with Gravy

    Serve with:

    • Mashed potatoes
    • Stuffing
    • Roasted vegetables
    • Dinner rolls

    This turkey roast with gravy recipe pairs well with dishes like this Stuffed Turkey Breast Recipe for holiday meal planning.


    Nutritional Information (Approx. per serving)

    Calories: 450–500 kcal
    Protein: 45–50g
    Carbohydrates: 5–10g
    Fat: 22–28g
    Sodium: Moderate


    Storage and Reheating

    Store turkey and gravy separately in the refrigerator for up to 4 days.

    For best results:

    • Reheat gently with extra broth or gravy
    • Store carved turkey in airtight containers


    Frequently Asked Questions

    How do I keep turkey from drying out?

    Avoid overcooking and allow the turkey to rest before slicing.

    Can I roast only a turkey breast?

    Yes, reduce cooking time and monitor internal temperature carefully.


    How to Keep Turkey Moist and Flavorful

    This turkey roast with gravy recipe depends on proper roasting technique.

    Turkey is naturally lean, so maintaining moisture is important. Rubbing butter under the skin helps protect the meat during cooking while adding flavor.

    Roasting at moderate temperature allows even cooking without drying out the breast meat too quickly.

    Allowing the turkey to rest after roasting helps retain juices and improves texture when carving.


    How to Make Smooth and Rich Gravy

    The key to this turkey roast with gravy recipe is using flavorful pan drippings.

    Whisking flour into the turkey fat creates a roux that thickens the gravy smoothly. Adding stock gradually prevents lumps and creates balanced consistency.

    Simmering the gravy briefly allows flavors to develop while thickening naturally.

    Seasoning should be adjusted at the end since turkey drippings can already contain salt.


    Variations You Can Try

    • Add citrus for brighter flavor
    • Use smoked paprika for depth
    • Add white wine to gravy
    • Use herb butter under the skin


    Common Mistakes to Avoid

    • Overcooking the turkey
    • Not resting before carving
    • Skipping thermometer checks
    • Burning pan drippings


    Make-Ahead and Storage Tips

    This turkey roast with gravy recipe works well for holiday preparation.

    • Prepare seasoning mixture ahead
    • Roast turkey in advance if needed
    • Store leftovers up to 4 days
    • Freeze extra gravy separately


    How to Turn This Into a Complete Holiday Meal

    This turkey roast with gravy recipe can easily become the centerpiece of a full holiday dinner.

    Serve it with stuffing, mashed potatoes, vegetables, and cranberry sauce for a traditional meal. Bread rolls and lighter vegetable sides help balance the richness of the turkey and gravy.

    This makes it ideal for family gatherings, celebrations, and holiday entertaining.


    Final Thoughts

    This turkey roast with gravy recipe is flavorful, comforting, and reliable, making it an excellent centerpiece for holiday meals and family dinners.


    Related Recipes You’ll Love

    – Stuffed Turkey Breast Recipe
    – Honey Glazed Ham Recipe
    – Bacon Wrapped Meatloaf


    Explore More Easy Dinner Recipes

    Discover more quick and simple meal ideas for any night:

    – Easy Dinner Recipes


    Author Note

    Dinners Recipe Team shares simple, reliable recipes designed for home cooks. Our goal is to make cooking easier while delivering flavorful, satisfying meals.
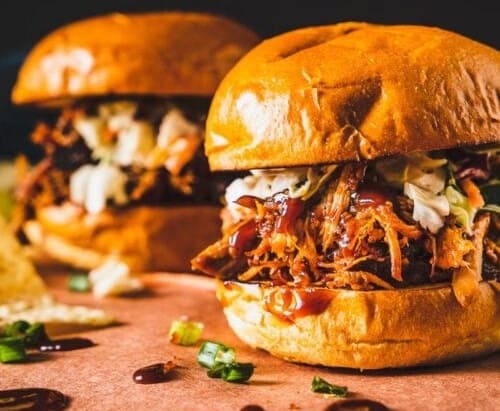
  • Pulled Pork Sandwich Recipe – 7 Easy Tips for Tender BBQ Pork

    Pulled Pork Sandwich Recipe – 7 Easy Tips for Tender BBQ Pork

    Pulled pork sandwich recipe is a classic barbecue meal made with slow-cooked shredded pork served on soft sandwich buns. This pulled pork sandwich recipe creates tender, juicy meat packed with smoky, savory flavor and coated in rich barbecue sauce.

    This pulled pork sandwich recipe is perfect for cookouts, family dinners, game days, or meal prep. Slow cooking allows the pork to become incredibly tender while developing deep flavor throughout the meat.


    Table of Contents

    • Ingredients
    • How to Make Pulled Pork Sandwich Recipe
    • Pro Tips for Best Results
    • Serving Suggestions for Pulled Pork Sandwiches
    • Nutritional Information
    • Frequently Asked Questions


    Why This Pulled Pork Sandwich Recipe Works

    This pulled pork sandwich recipe is designed to create juicy, flavorful shredded pork.

    • Slow cooking creates tender texture
    • Dry rub builds deep flavor
    • Pork shoulder stays moist during cooking
    • Barbecue sauce adds balance and richness


    Ingredients

    For the Pork

    • 4–5 lb pork shoulder
    • 3 tablespoons olive oil

    Dry Rub

    • 2 tablespoons brown sugar
    • 1 tablespoon paprika
    • 2 teaspoons garlic powder
    • 2 teaspoons onion powder
    • 2 teaspoons chili powder
    • 1 teaspoon cumin
    • 1 teaspoon black pepper
    • 1½ teaspoons salt
    • ½ teaspoon cayenne pepper (optional)

    For Cooking

    • 1 cup chicken broth or apple cider
    • 1 onion, quartered
    • 4 cloves garlic, smashed

    For Serving

    • 2 cups barbecue sauce
    • 8–10 sandwich buns
    • Coleslaw (optional)
    • Pickles (optional)


    How to Make Pulled Pork Sandwich Recipe

    Step 1: Prepare the Pork

    Trim excess fat and pat pork dry.

    Rub with oil.

    Step 2: Season

    Mix dry rub ingredients and coat pork evenly.

    Marinate briefly or overnight if possible.

    Step 3: Slow Cook

    Place pork with broth, onion, and garlic.

    Cook low and slow until fork-tender.

    Step 4: Shred the Pork

    Remove pork and shred using two forks.

    Reserve some cooking liquid.

    Step 5: Add Sauce

    Mix shredded pork with barbecue sauce and a little cooking liquid.

    Step 6: Assemble Sandwiches

    Toast buns lightly and fill with pulled pork.

    Add coleslaw and pickles if desired.


    Pro Tips for Best Results

    • Use pork shoulder for best texture
    • Cook low and slow for tenderness
    • Save cooking liquid for moisture
    • Toast buns for better texture


    Serving Suggestions for Pulled Pork Sandwiches

    Serve with:

    • Coleslaw
    • Baked beans
    • Potato salad
    • Cornbread

    This pulled pork sandwich recipe pairs well with dishes like this Chili Con Carne Recipe for a hearty comfort-food meal.


    Nutritional Information (Approx. per serving)

    Calories: 450–500 kcal
    Protein: 30–35g
    Carbohydrates: 35–45g
    Fat: 18–25g
    Sodium: Moderate to high


    Storage and Reheating

    Store pulled pork in the refrigerator for up to 4 days.

    For best results:

    • Reheat with extra broth or sauce
    • Freeze up to 3 months


    Frequently Asked Questions

    What cut of pork works best?

    Pork shoulder is ideal because it becomes tender during slow cooking.

    Can I make pulled pork without barbecue sauce?

    Yes, dry-rub or vinegar-based versions also work well.


    How to Create Tender Pulled Pork

    This pulled pork sandwich recipe depends on slow cooking and proper moisture.

    Pork shoulder contains connective tissue and fat that break down during long cooking times. This creates the signature tender texture needed for pulled pork.

    Cooking at lower temperatures prevents the meat from drying out while allowing flavors to fully develop.

    Adding broth or apple cider during cooking helps maintain moisture and enhances flavor.


    How to Build Deep Barbecue Flavor

    The key to this pulled pork sandwich recipe is layering seasoning and smoke-inspired flavors.

    A balanced dry rub combines sweetness, spice, and savory seasoning to flavor the meat thoroughly. Paprika and chili powder help create a barbecue-style profile.

    Mixing some cooking liquid into the shredded pork keeps it juicy while carrying extra flavor into the meat.

    Using quality barbecue sauce enhances the final texture and richness of the sandwich.


    Variations You Can Try

    • Use spicy barbecue sauce
    • Add smoked paprika for deeper flavor
    • Make Carolina-style vinegar pork
    • Use Hawaiian rolls for sweetness


    Common Mistakes to Avoid

    • Cooking at high temperature
    • Not seasoning enough
    • Skipping resting time
    • Using lean pork cuts


    Make-Ahead and Storage Tips

    This pulled pork sandwich recipe works very well for meal prep.

    • Prepare pork ahead of time
    • Refrigerate up to 4 days
    • Freeze portions for future meals
    • Reheat slowly with extra liquid


    How to Turn This Into a Complete Meal

    This pulled pork sandwich recipe can easily become a full barbecue-style dinner.

    Serve it with coleslaw, baked beans, cornbread, or potato salad for a balanced meal. Pickles and lighter vegetable sides help cut through the richness of the pork and sauce.

    This makes it ideal for gatherings, casual dinners, and cookouts.


    Final Thoughts

    This pulled pork sandwich recipe is smoky, tender, and satisfying, making it a dependable choice for hearty comfort food meals.


    Related Recipes You’ll Love

    – Chili Con Carne Recipe
    – Bacon Wrapped Meatloaf
    – Turkey Roast with Gravy Recipe


    Explore More Easy Dinner Recipes

    Discover more quick and simple meal ideas for any night:

    – Easy Dinner Recipes


    Author Note

    Dinners Recipe Team shares simple, reliable recipes designed for home cooks. Our goal is to make cooking easier while delivering flavorful, satisfying meals.
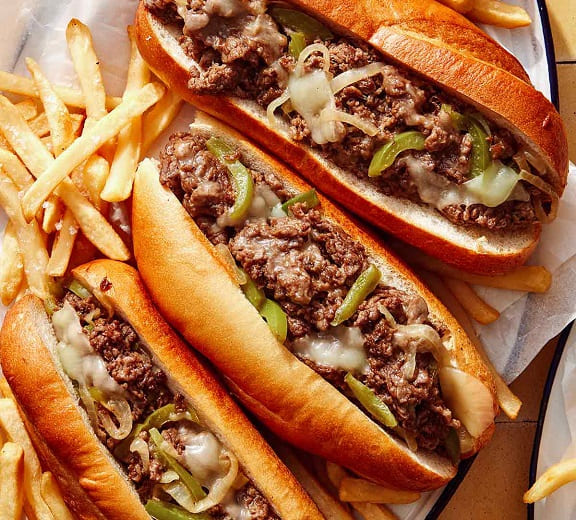
  • Philly Cheesesteak Recipe

    Philly Cheesesteak Recipe

    Philly cheesesteak recipe is a classic American sandwich made with thinly sliced beef, melted cheese, and sautéed onions served inside a soft hoagie roll. This Philly cheesesteak recipe delivers rich flavor, tender steak, and gooey melted cheese, making it a dependable comfort-food favorite.

    This Philly cheesesteak recipe focuses on proper steak preparation, balanced toppings, and simple cooking techniques to recreate the famous Philadelphia sandwich at home.


    Table of Contents

    • Ingredients
    • How to Make Philly Cheesesteak Recipe
    • Pro Tips for Best Results
    • Serving Suggestions for Philly Cheesesteak
    • Nutritional Information
    • Frequently Asked Questions


    Why This Philly Cheesesteak Recipe Works

    This Philly cheesesteak recipe creates a balanced and flavorful sandwich.

    • Thin steak cooks quickly and stays tender
    • Melted cheese creates rich texture
    • Caramelized onions add sweetness
    • Soft rolls absorb flavor without falling apart


    Ingredients

    For the Steak

    • 1½ lb ribeye steak
    • 2 tablespoons vegetable oil
    • Salt and black pepper

    For the Vegetables

    • 1 large onion, sliced
    • 1 green bell pepper, sliced (optional)
    • 1 cup mushrooms, sliced (optional)

    For the Cheese

    • 8 slices provolone cheese

    For the Bread

    • 4 hoagie rolls
    • 2 tablespoons butter (optional)


    How to Make Philly Cheesesteak Recipe

    Step 1: Prepare the Steak

    Partially freeze steak briefly for easier slicing.

    Slice very thinly against the grain.

    Step 2: Cook the Vegetables

    Cook onions and optional vegetables until soft and caramelized.

    Set aside.

    Step 3: Cook the Steak

    Heat oil in a skillet.

    Cook steak quickly over medium-high heat until browned.

    Step 4: Combine and Add Cheese

    Return vegetables to the skillet.

    Top with cheese and allow it to melt.

    Step 5: Prepare the Rolls

    Lightly toast hoagie rolls if desired.

    Step 6: Assemble and Serve

    Fill rolls with steak and cheese mixture.

    Serve immediately while hot.


    Pro Tips for Best Results

    • Slice steak very thinly
    • Use ribeye for best flavor
    • Avoid overcooking the beef
    • Use soft hoagie rolls


    Serving Suggestions for Philly Cheesesteak

    Serve with:

    • French fries
    • Onion rings
    • Potato chips
    • Pickles

    This Philly cheesesteak recipe pairs well with dishes like this Classic Buffalo Wings Recipe for a complete comfort-food meal.


    Nutritional Information (Approx. per serving)

    Calories: 600–650 kcal
    Protein: 35–40g
    Carbohydrates: 35–45g
    Fat: 30–35g
    Sodium: Moderate to high


    Storage and Reheating

    Store in the refrigerator for up to 3 days.

    For best results:

    • Reheat steak separately
    • Toast fresh bread before serving
    • Avoid microwaving assembled sandwiches


    Frequently Asked Questions

    What cheese is traditional for Philly cheesesteak?

    Cheez Whiz, provolone, and American cheese are all common options.

    What cut of steak works best?

    Ribeye is preferred because it stays tender and flavorful.


    How to Make Cheesesteak Beef Tender

    This Philly cheesesteak recipe depends on properly slicing and cooking the steak.

    Partially freezing the steak before slicing helps create very thin cuts that cook quickly and evenly.

    Cooking the steak over high heat prevents it from steaming and helps retain tenderness. Overcooking can make the meat tough and dry.

    Using ribeye provides extra fat and marbling, which improves flavor and texture.


    How to Build Authentic Cheesesteak Flavor

    The balance of steak, onions, cheese, and bread creates the classic Philly cheesesteak flavor.

    Caramelized onions add sweetness that balances the richness of the beef and cheese. Melted cheese helps bind the filling together while adding creaminess.

    Using a soft but sturdy hoagie roll is important because it absorbs juices without becoming soggy too quickly.

    Keeping toppings simple allows the steak flavor to remain the focus.


    Variations You Can Try

    • Cheez Whiz cheesesteak
    • Mushroom cheesesteak
    • Spicy jalapeño cheesesteak
    • Chicken cheesesteak


    Common Mistakes to Avoid

    • Slicing steak too thick
    • Overcooking the beef
    • Using dry bread
    • Overloading with toppings


    Make-Ahead and Storage Tips

    This Philly cheesesteak recipe works well for quick meals and prep.

    • Slice steak ahead of time
    • Prepare vegetables in advance
    • Store filling separately from bread
    • Reheat quickly before serving


    How to Turn This Into a Complete Meal

    This Philly cheesesteak recipe can easily become a full comfort-food dinner.

    Serve the sandwich with fries, chips, salad, or onion rings for a balanced plate. Adding lighter sides can help offset the richness of the steak and cheese.

    This makes it ideal for casual dinners, game-day meals, and gatherings.


    Final Thoughts

    This Philly cheesesteak recipe is simple, hearty, and packed with classic flavor, making it a dependable option for sandwiches and comfort-food meals.


    Related Recipes You’ll Love

    – Classic Buffalo Wings Recipe
    – Pulled Pork Sandwich
    – Chili Con Carne Recipe
    – Classic BBQ Ribs Recipe


    Explore More Easy Dinner Recipes

    Discover more quick and simple meal ideas for any night:

    – Easy Dinner Recipes


    Author Note

    Dinners Recipe Team shares simple, reliable recipes designed for home cooks. Our goal is to make cooking easier while delivering flavorful, satisfying meals.

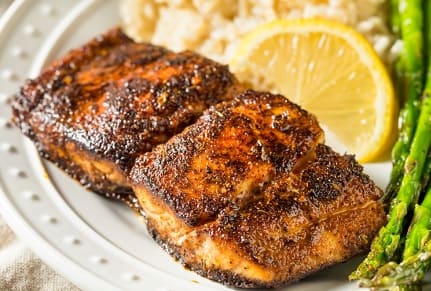
  • Cajun Blackened Fish Recipe for Bold Louisiana Flavor

    Cajun Blackened Fish Recipe for Bold Louisiana Flavor

    Cajun blackened fish recipe is a flavorful seafood dish made with firm white fish coated in bold Cajun seasoning and seared at high heat until a dark crust forms. This Cajun blackened fish recipe creates smoky flavor, flaky texture, and a spicy crust that makes it perfect for quick dinners and seafood meals.

    This Cajun blackened fish recipe focuses on proper seasoning, high-heat cooking, and balanced spice levels to achieve authentic Louisiana-style flavor at home.


    Table of Contents

    • Ingredients
    • How to Make Cajun Blackened Fish Recipe
    • Pro Tips for Best Results
    • Serving Suggestions for Cajun Blackened Fish
    • Nutritional Information
    • Frequently Asked Questions


    Why This Cajun Blackened Fish Recipe Works

    This Cajun blackened fish recipe is designed to create bold flavor and flaky texture.

    • Cajun seasoning creates smoky crust
    • High heat develops authentic blackened texture
    • Butter helps spices adhere properly
    • Fish cooks quickly while staying tender


    Ingredients

    For the Fish

    • 4 white fish fillets
    • 4 tablespoons butter, melted
    • 1 tablespoon olive oil
    • Lemon wedges

    For the Cajun Seasoning

    • 2 teaspoons paprika
    • 1 teaspoon cayenne pepper
    • 1 teaspoon garlic powder
    • 1 teaspoon onion powder
    • 1 teaspoon thyme
    • 1 teaspoon oregano
    • 1 teaspoon black pepper
    • 1 teaspoon salt
    • ½ teaspoon white pepper


    How to Make Cajun Blackened Fish Recipe

    Step 1: Prepare the Fish

    Pat fish dry thoroughly.

    Brush with melted butter.

    Step 2: Season the Fish

    Mix Cajun seasoning ingredients.

    Coat fish evenly on both sides.

    Step 3: Heat the Pan

    Heat a cast-iron skillet over high heat until very hot.

    Step 4: Cook the Fish

    Place fish in the skillet and cook until blackened and flaky.

    Step 5: Serve

    Serve hot with lemon wedges and side dishes of choice.


    Pro Tips for Best Results

    • Use a very hot skillet
    • Avoid overcrowding the pan
    • Pat fish dry before seasoning
    • Adjust cayenne for preferred spice level


    Serving Suggestions for Cajun Blackened Fish

    Serve with:

    • Cajun rice
    • Roasted vegetables
    • Coleslaw
    • Cornbread

    This Cajun blackened fish recipe pairs well with dishes like this New Orleans Jambalaya for a Louisiana-inspired meal.


    Nutritional Information (Approx. per serving)

    Calories: 250–300 kcal
    Protein: 30–35g
    Carbohydrates: 2–5g
    Fat: 12–18g
    Sodium: Moderate


    Storage and Reheating

    Store in the refrigerator for up to 2 days.

    For best results:

    • Reheat gently in a skillet
    • Avoid microwaving to preserve texture
    • Add fresh lemon before serving


    Frequently Asked Questions

    What fish works best for blackened fish?

    Redfish, snapper, catfish, cod, and tilapia work well.

    Why is it called blackened fish?

    The dark crust forms from spices cooking at high heat, not from burning.


    How to Create an Authentic Blackened Crust

    This Cajun blackened fish recipe depends on proper heat and seasoning.

    A very hot cast-iron skillet helps create the signature crust quickly while keeping the fish moist inside.

    Butter helps the seasoning adhere and encourages browning during cooking.

    Allowing the fish to cook undisturbed for a few minutes helps develop the dark crust without sticking.


    How to Balance Cajun Flavor

    Cajun seasoning combines smoky, savory, and spicy elements.

    Paprika provides smokiness and color while cayenne adds heat. Garlic, onion, thyme, and oregano create balanced depth without overpowering the fish.

    Adjusting the amount of cayenne helps control spice level while maintaining authentic flavor.

    Fresh lemon juice adds brightness and balances the richness of the seasoning and butter.


    Variations You Can Try

    • Blackened shrimp
    • Blackened chicken
    • Mild Cajun seasoning version
    • Fish tacos with blackened fish


    Common Mistakes to Avoid

    • Using a pan that is not hot enough
    • Overcooking the fish
    • Using too much seasoning
    • Moving fish too early during cooking


    Make-Ahead and Storage Tips

    This Cajun blackened fish recipe works best when served fresh.

    • Mix seasoning ahead of time
    • Prepare fish shortly before cooking
    • Store leftovers up to 2 days
    • Reheat carefully to avoid drying out


    How to Turn This Into a Complete Meal

    This Cajun blackened fish recipe can easily become a full seafood dinner.

    Serve the fish with rice, vegetables, salad, or cornbread for a balanced meal. Adding lighter sides can help balance the bold Cajun seasoning and richness of the fish.

    This also works well for tacos, bowls, or sandwiches using leftover fish.


    Final Thoughts

    This Cajun blackened fish recipe is bold, smoky, and easy to prepare, making it a dependable option for quick seafood dinners with authentic Louisiana flavor.


    Related Recipes You’ll Love

    – New Orleans Jambalaya
    – New England Baked Haddock Recipe
    – Crab Cakes Recipe


    Explore More Easy Dinner Recipes

    Discover more quick and simple meal ideas for any night:

    – Easy Dinner Recipes


    Author Note

    Dinners Recipe Team shares simple, reliable recipes designed for home cooks. Our goal is to make cooking easier while delivering flavorful, satisfying meals.