Category: Easy Dinner Recipes

Easy dinner recipes are designed to help you prepare flavorful meals with simple ingredients and practical cooking methods. This category includes quick chicken dinners, one-pot meals, pasta recipes, comfort food favorites, and family-friendly dishes that work well for busy schedules.

These recipes focus on approachable preparation while still delivering satisfying flavor and balanced meals. From baked chicken and hearty casseroles to skillet dinners and simple seafood recipes, each dish is created with convenience and consistency in mind.

Whether you need fast weeknight dinners, meal prep ideas, or comforting homemade meals, this category provides easy dinner recipes that make everyday cooking simpler and more enjoyable.

  • Beef Sukiyaki Recipe

    Beef Sukiyaki Recipe

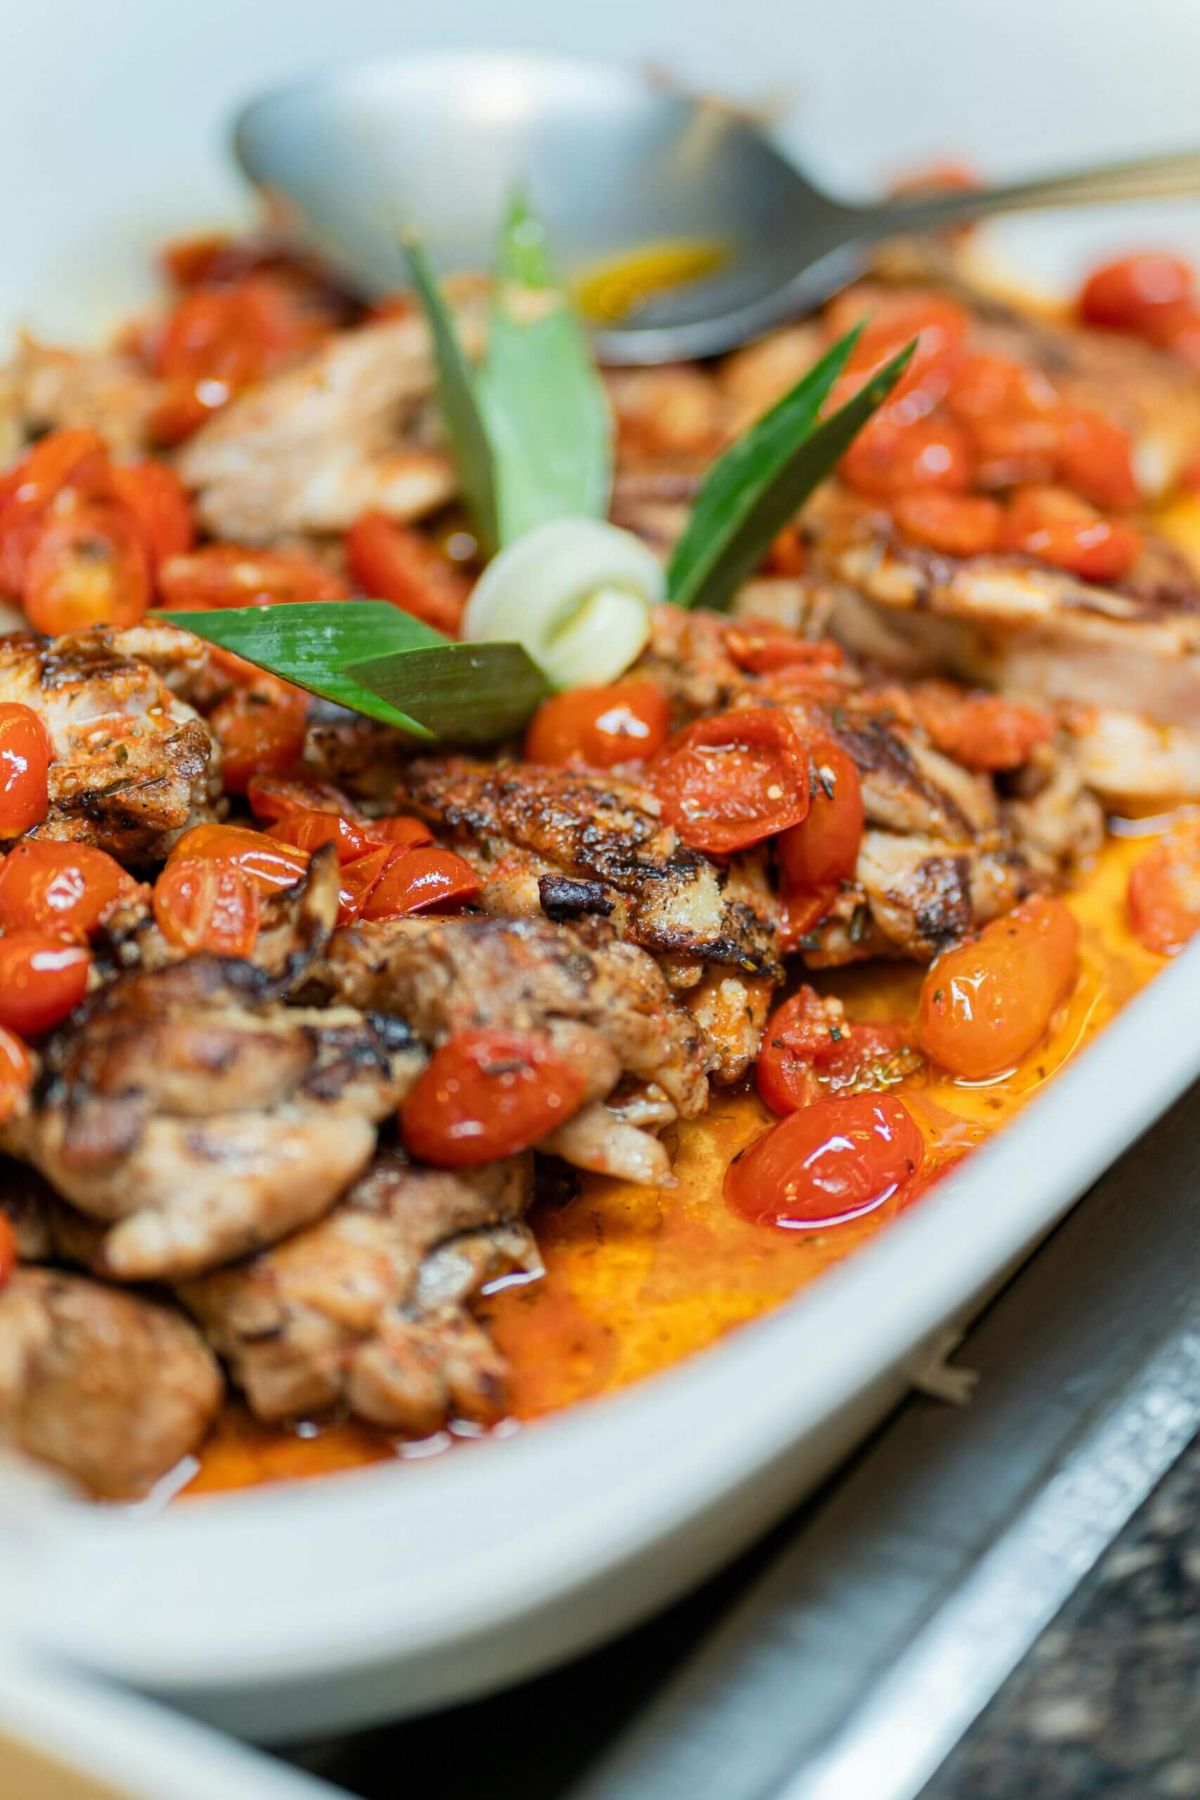
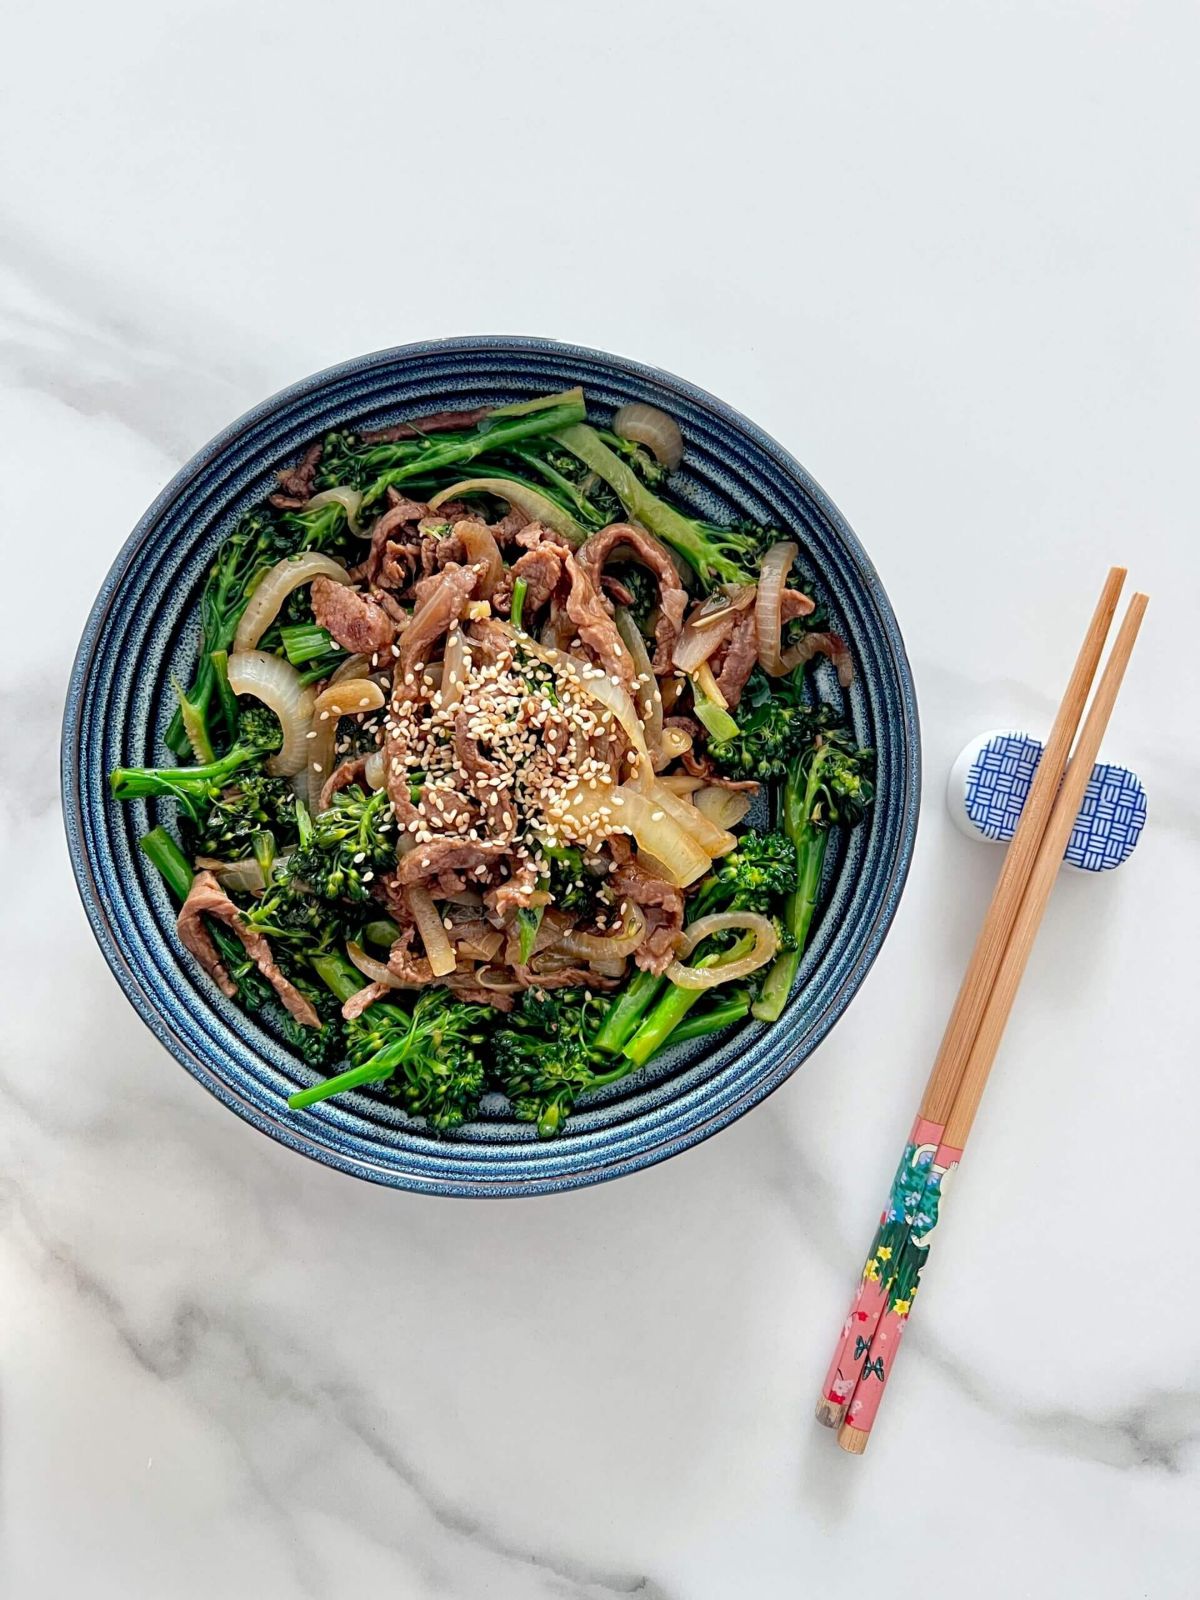
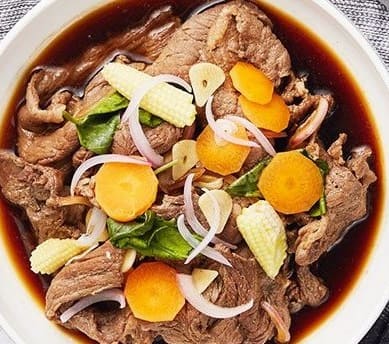
    Beef sukiyaki recipe is a traditional Japanese hot pot dish made with thinly sliced beef, vegetables, tofu, and noodles simmered in a sweet and savory soy-based broth. This beef sukiyaki recipe delivers a rich, comforting flavor while offering a balanced combination of textures and ingredients.

    This dish is a staple in Japanese cuisine and is often enjoyed as a shared meal, especially during colder months. Sukiyaki stands out for its interactive cooking style, where ingredients are gently simmered and served directly from the pot.

    Learn more about Sukiyaki

    This beef sukiyaki recipe focuses on proper ingredient preparation, balanced broth, and gentle simmering to achieve consistent, authentic results.


    Table of Contents

    • Ingredients
    • How to Make Beef Sukiyaki Recipe
    • Pro Tips for Best Results
    • Serving Suggestions for Beef Sukiyaki
    • Nutritional Information
    • Frequently Asked Questions


    Why This Beef Sukiyaki Recipe Works

    This beef sukiyaki recipe is designed to create a rich and balanced dish.

    • Thinly sliced beef cooks quickly and stays tender
    • Sweet-savory broth builds deep flavor
    • Variety of ingredients adds texture
    • Simmering method enhances consistency


    Ingredients

    For the Broth (Sukiyaki Sauce)

    • ½ cup soy sauce
    • ¼ cup sugar
    • ¼ cup mirin
    • ½ cup water or dashi stock

    For Main Ingredients

    • 300–400 grams thinly sliced beef (ribeye or sirloin)
    • 1 block firm tofu (cubed)
    • 1 cup napa cabbage (chopped)
    • 1 onion (sliced)
    • 1 cup mushrooms (shiitake or button)
    • 1 cup shirataki noodles (or glass noodles)
    • 2–3 spring onions (cut into lengths)

    Optional

    • 2–3 eggs (for dipping)


    How to Make Beef Sukiyaki Recipe

    Step 1: Prepare the Sauce

    Mix soy sauce, sugar, mirin, and water (or dashi) until sugar dissolves.

    Step 2: Heat the Pan

    Use a wide pan or shallow pot over medium heat.

    Step 3: Cook the Beef

    Lightly sear beef slices until just browned. Sprinkle a small amount of sugar for caramelization.

    Step 4: Add Ingredients

    Add cabbage, onions, mushrooms, tofu, and noodles.

    Step 5: Simmer

    Pour sauce over ingredients and simmer gently for 5–10 minutes.

    Step 6: Serve

    Serve hot directly from the pan.


    Pro Tips for Best Results

    • Use very thinly sliced beef
    • Do not overcook the beef
    • Adjust sweetness to taste
    • Use dashi for deeper flavor
    • Add ingredients in stages for best texture


    Serving Suggestions for Beef Sukiyaki

    Serve with:

    • Steamed rice
    • Raw beaten egg (optional, traditional)
    • Pickled vegetables
    • Light side dishes

    This beef sukiyaki recipe pairs well with dishes like Tonkatsu or Karaage for a complete Japanese-style meal.


    Nutritional Information (Approx. per serving)

    Calories: 400–500 kcal
    Protein: 25–30g
    Carbohydrates: 20–25g
    Fat: 20–25g
    Sodium: Moderate


    Storage and Reheating

    Store in the refrigerator for up to 2 days.

    For best results:

    • Reheat gently on stovetop
    • Avoid overcooking when reheating
    • Add a little water if needed


    Frequently Asked Questions

    What cut of beef is best?

    Ribeye or sirloin works best due to tenderness.

    Can I make it without mirin?

    Yes, substitute with sugar and a small amount of water or mild vinegar.

    Is raw egg safe?

    Use pasteurized eggs if consuming raw, or skip if preferred.

    Can I make it vegetarian?

    Yes, use tofu, mushrooms, and vegetables instead of beef.


    How to Build a Flavorful Sukiyaki Broth

    This beef sukiyaki recipe relies on balancing sweet and savory elements.

    Soy sauce provides saltiness, while sugar and mirin add sweetness. Simmering ingredients together allows flavors to blend naturally.

    Using dashi enhances umami and depth.


    How to Keep Beef Tender

    The key to this beef sukiyaki recipe is gentle cooking.

    Thin slices cook quickly, so avoid overcooking. Adding beef in batches helps maintain texture and prevents toughness.

    Simmering at low heat ensures consistent results.


    Variations You Can Try

    • Add more vegetables
    • Use different mushrooms
    • Try seafood instead of beef
    • Adjust sweetness level


    Common Mistakes to Avoid

    • Overcooking beef
    • Using thick meat slices
    • Adding too much liquid
    • Cooking at high heat


    Make-Ahead and Storage Tips

    This beef sukiyaki recipe works well for preparation.

    • Slice ingredients ahead of time
    • Prepare sauce in advance
    • Store leftovers properly


    How to Turn This Into a Complete Meal

    This beef sukiyaki recipe can easily become a full meal.

    Serve with rice, vegetables, and light sides for a balanced and satisfying dining experience.


    Final Thoughts

    This beef sukiyaki recipe is rich, comforting, and easy to prepare, making it a great option for both everyday meals and special occasions.


    Related Recipes You’ll Love

    – Tonkatsu
    – Karaage
    – Chicken Katsu Curry


    Explore More Dinner Recipes

    – Easy Dinner Recipes


    Author Note

    Dinners Recipe Team shares simple, reliable recipes designed for home cooks. Our goal is to make cooking easier while delivering flavorful, satisfying meals.

  • Garlic Parmesan Chicken Recipe

    Garlic Parmesan Chicken Recipe

    Garlic Parmesan chicken recipe is a simple and flavorful dish made with tender chicken coated in a crispy garlic and Parmesan crust. This garlic Parmesan chicken recipe delivers a rich, savory flavor with a satisfying texture that works well for both weeknight dinners and casual meals.

    This garlic Parmesan chicken recipe focuses on creating a balanced coating and proper cooking technique to achieve a crispy exterior while keeping the chicken juicy inside. It’s a reliable option that pairs well with a variety of sides.


    Table of Contents

    • Ingredients
    • How to Make Garlic Parmesan Chicken Recipe
    • Pro Tips for Best Results
    • Serving Suggestions for Garlic Parmesan Chicken
    • Nutritional Information
    • Frequently Asked Questions


    Why This Garlic Parmesan Chicken Recipe Works

    This garlic Parmesan chicken recipe is designed to create a crispy, flavorful result.

    • Parmesan adds a rich, savory taste
    • Garlic enhances depth of flavor
    • Coating creates a crisp texture
    • Chicken stays tender inside


    Ingredients

    For the Chicken

    • 2 chicken breasts
    • Salt and pepper
    • 1 tablespoon olive oil

    For the Coating

    • ½ cup grated Parmesan cheese
    • ½ cup breadcrumbs
    • 3 cloves garlic, minced
    • 1 teaspoon dried herbs

    For Binding

    • 1 egg


    How to Make Garlic Parmesan Chicken Recipe

    Step 1: Prepare the Chicken

    Pat chicken dry and season with salt and pepper.

    Step 2: Prepare Coating

    Mix Parmesan, breadcrumbs, garlic, and herbs.

    Step 3: Coat the Chicken

    Dip chicken in beaten egg, then coat with mixture.

    Step 4: Cook

    Bake at 400°F (200°C) for 20–25 minutes or pan-fry until golden and cooked through.

    Step 5: Rest

    Let chicken rest briefly before serving.

    Step 6: Serve

    Serve hot.


    Pro Tips for Best Results

    • Press coating firmly onto chicken
    • Use fresh Parmesan for best flavor
    • Do not overcook
    • Let chicken rest before slicing


    Serving Suggestions for Garlic Parmesan Chicken

    Serve with:

    • Pasta
    • Vegetables
    • Salad
    • Rice

    This garlic Parmesan chicken recipe pairs well with dishes like this Creamy Tuscan Chicken for a balanced meal.


    Nutritional Information (Approx. per serving)

    Calories: 400–500 kcal
    Protein: 30–35g
    Carbohydrates: 15–20g
    Fat: 20–25g
    Sodium: Moderate


    Storage and Reheating

    Store in the refrigerator for up to 3–4 days.

    For best results:

    • Reheat in the oven
    • Avoid microwaving to keep coating crisp


    Frequently Asked Questions

    Can I use chicken thighs?

    Yes, they work well and stay juicy.

    Can I air fry this?

    Yes, cook at 375°F (190°C) for 12–15 minutes.


    How to Get a Crispy Parmesan Coating

    This garlic Parmesan chicken recipe depends on proper coating technique.

    Using a combination of breadcrumbs and Parmesan creates a crisp texture. Pressing the coating firmly onto the chicken helps it stick during cooking.

    Cooking at the right temperature ensures the coating becomes golden without burning.


    How to Keep Chicken Juicy Inside

    The key to this garlic Parmesan chicken recipe is balancing crispness with moisture.

    Cooking the chicken until just done prevents dryness. Allowing it to rest helps retain juices and improves texture.

    Using even-sized pieces ensures consistent cooking.


    Variations You Can Try

    • Add chili flakes for heat
    • Use panko breadcrumbs for extra crunch
    • Add lemon zest for brightness
    • Serve with dipping sauce


    Common Mistakes to Avoid

    • Not pressing coating properly
    • Overcooking chicken
    • Using too much oil
    • Skipping the resting step


    Make-Ahead and Storage Tips

    This garlic Parmesan chicken recipe is great for meal prep.

    • Prepare coating ahead
    • Store cooked chicken up to 4 days
    • Reheat properly


    How to Turn This Into a Complete Meal

    This garlic Parmesan chicken recipe can easily become a full dinner.

    Serve it with pasta, vegetables, or salad to create a balanced meal. Adding a sauce or side dish can enhance both flavor and variety.


    Final Thoughts

    This garlic Parmesan chicken recipe is crispy, flavorful, and easy to prepare, making it a great option for a wide range of meals.


    Related Recipes You’ll Love

    – Creamy Tuscan Chicken
    – Lemon Garlic Chicken
    – Baked Chicken Breast


    Explore More Chicken Dinner Recipes

    Discover more easy and flavorful chicken dinner ideas below:

    – Chicken Dinner Recipes


    Explore More Easy Dinner Recipes

    Discover more quick and simple meal ideas for any night:

    – Easy Dinner Recipes


    Author Note

    Dinners Recipe Team shares simple, reliable recipes designed for home cooks. Our goal is to make cooking easier while delivering flavorful, satisfying meals.

  • Creamy Tuscan Chicken Recipe

    Creamy Tuscan Chicken Recipe

    Creamy Tuscan chicken recipe is a rich and comforting dish made with tender chicken, garlic, cream, and sun-dried tomatoes. This creamy Tuscan chicken recipe delivers bold flavor with a smooth, savory sauce that pairs well with a variety of sides.

    This creamy Tuscan chicken recipe focuses on simple ingredients and proper cooking technique to create a restaurant-style dish at home. It’s a great option for weeknight dinners or when you want something a bit more indulgent.


    Table of Contents

    • Ingredients
    • How to Make Creamy Tuscan Chicken Recipe
    • Pro Tips for Best Results
    • Serving Suggestions for Creamy Tuscan Chicken
    • Nutritional Information
    • Frequently Asked Questions


    Why This Creamy Tuscan Chicken Recipe Works

    This creamy Tuscan chicken recipe is designed to deliver rich flavor with minimal effort.

    • Cream creates a smooth, rich sauce
    • Garlic and herbs add depth
    • Sun-dried tomatoes provide contrast
    • Chicken stays tender and juicy


    Ingredients

    For the Chicken

    • 2 chicken breasts or thighs
    • Salt and pepper
    • 1 tablespoon olive oil

    For the Sauce

    • 3 cloves garlic, minced
    • ½ cup heavy cream
    • ½ cup chicken broth
    • ¼ cup sun-dried tomatoes
    • ¼ cup grated Parmesan cheese
    • 1 teaspoon dried Italian herbs
    • 1 cup spinach


    How to Make Creamy Tuscan Chicken Recipe

    Step 1: Prepare the Chicken

    Season chicken with salt and pepper.

    Step 2: Cook the Chicken

    Heat oil and cook chicken until browned and cooked through. Remove and set aside.

    Step 3: Make the Sauce

    In the same pan, cook garlic briefly, then add broth and cream.

    Step 4: Add Ingredients

    Add sun-dried tomatoes, herbs, and Parmesan.

    Step 5: Simmer

    Let sauce simmer until slightly thickened, then add spinach.

    Step 6: Combine

    Return chicken to the pan and coat with sauce.

    Step 7: Serve

    Serve hot.


    Pro Tips for Best Results

    • Do not overcook chicken
    • Let sauce thicken slightly
    • Use fresh garlic for best flavor
    • Adjust cream to taste


    Serving Suggestions for Creamy Tuscan Chicken

    Serve with:

    • Pasta
    • Rice
    • Mashed potatoes
    • Bread

    This creamy Tuscan chicken recipe pairs well with lighter dishes like this Lemon Garlic Chicken for a balanced meal plan.


    Nutritional Information (Approx. per serving)

    Calories: 500–600 kcal
    Protein: 25–30g
    Carbohydrates: 5–10g
    Fat: 35–40g
    Sodium: Moderate


    Storage and Reheating

    Store in the refrigerator for up to 3–4 days.

    For best results:

    • Reheat gently
    • Add a splash of broth or cream if needed


    Frequently Asked Questions

    Can I use milk instead of cream?

    Yes, but the sauce will be thinner.

    Can I use chicken thighs?

    Yes, they work well and add more flavor.


    How to Keep Chicken Tender in Creamy Dishes

    This creamy Tuscan chicken recipe depends on proper cooking technique.

    Cooking the chicken until just done and removing it before making the sauce helps prevent overcooking. Adding it back at the end keeps it juicy while allowing it to absorb flavor.


    How to Build a Rich, Balanced Sauce

    The sauce is the highlight of this creamy Tuscan chicken recipe.

    Heavy cream creates richness, while chicken broth prevents it from becoming too heavy. Parmesan cheese adds depth and helps thicken the sauce slightly.

    Sun-dried tomatoes provide contrast and prevent the dish from feeling overly rich.


    Variations You Can Try

    • Add mushrooms for extra texture
    • Use shrimp instead of chicken
    • Add chili flakes for heat
    • Use different herbs


    Common Mistakes to Avoid

    • Overcooking chicken
    • Using too much cream
    • Not seasoning properly
    • Skipping sauce reduction


    Make-Ahead and Storage Tips

    This creamy Tuscan chicken recipe works well for meal prep.

    • Cook ahead of time
    • Store up to 4 days
    • Reheat gently


    How to Turn This Into a Complete Meal

    This creamy Tuscan chicken recipe can easily become a full dinner.

    Serve it with pasta, rice, or potatoes to absorb the sauce. Adding vegetables or a salad balances the richness and creates a more complete meal.


    Final Thoughts

    This creamy Tuscan chicken recipe is rich, flavorful, and easy to prepare, making it a great option for both everyday meals and special occasions.


    Related Recipes You’ll Love

    – Lemon Garlic Chicken
    – Baked Chicken Breast
    – Garlic Butter Shrimp
    – Chicken Cacciatore
    – Creamy Mushroom Risotto


    Explore More Chicken Dinner Recipes

    Discover more easy and flavorful chicken dinner ideas below:

    – Chicken Dinner Recipes


    Explore More Easy Dinner Recipes

    Discover more quick and simple meal ideas for any night:

    – Easy Dinner Recipes


    Author Note

    Dinners Recipe Team shares simple, reliable recipes designed for home cooks. Our goal is to make cooking easier while delivering flavorful, satisfying meals.

  • Lemon Garlic Chicken Recipe

    Lemon Garlic Chicken Recipe

    Lemon garlic chicken recipe is a simple and flavorful dish made with tender chicken, fresh lemon juice, and garlic. This lemon garlic chicken recipe delivers a bright, balanced flavor and is perfect for quick weeknight meals.

    This lemon garlic chicken recipe focuses on using fresh ingredients and proper cooking techniques to create juicy chicken with a light, savory sauce. It’s an easy and reliable option that pairs well with a variety of sides.


    Table of Contents

    • Ingredients
    • How to Make Lemon Garlic Chicken Recipe
    • Pro Tips for Best Results
    • Serving Suggestions for Lemon Garlic Chicken
    • Nutritional Information
    • Frequently Asked Questions


    Why This Lemon Garlic Chicken Recipe Works

    This lemon garlic chicken recipe is designed to be simple and flavorful.

    • Lemon adds brightness and balance
    • Garlic enhances depth of flavor
    • Quick cooking keeps chicken tender
    • Simple ingredients make it easy


    Ingredients

    For the Chicken

    • 2 chicken breasts or thighs
    • Salt and pepper
    • 1 tablespoon olive oil

    For the Sauce

    • 3 cloves garlic, minced
    • 2 tablespoons lemon juice
    • 1 teaspoon lemon zest
    • 1 tablespoon butter
    • ½ cup chicken broth
    • 1 teaspoon dried herbs (optional)


    How to Make Lemon Garlic Chicken Recipe

    Step 1: Prepare the Chicken

    Pat chicken dry and season with salt and pepper.

    Step 2: Cook the Chicken

    Heat oil and cook chicken until browned and cooked through. Remove and set aside.

    Step 3: Make the Sauce

    In the same pan, cook garlic briefly, then add lemon juice, zest, and broth.

    Step 4: Simmer

    Let the sauce simmer for a few minutes.

    Step 5: Finish

    Add butter and return chicken to the pan. Spoon sauce over chicken.

    Step 6: Serve

    Serve immediately.


    Pro Tips for Best Results

    • Use fresh lemon juice for best flavor
    • Do not overcook chicken
    • Adjust lemon to taste
    • Let sauce reduce slightly


    Serving Suggestions for Lemon Garlic Chicken

    Serve with:

    • Rice
    • Vegetables
    • Salad
    • Potatoes

    This lemon garlic chicken recipe pairs well with dishes like this Baked Chicken Breast for a complete meal plan.


    Nutritional Information (Approx. per serving)

    Calories: 300–400 kcal
    Protein: 25–30g
    Carbohydrates: 5–10g
    Fat: 15–20g
    Sodium: Moderate


    Storage and Reheating

    Store in the refrigerator for up to 3–4 days.

    For best results:

    • Reheat gently
    • Add a small amount of liquid if needed


    Frequently Asked Questions

    Can I use chicken thighs?

    Yes, they are juicier and more forgiving.

    Can I bake this instead?

    Yes, bake and then add sauce separately.


    How to Keep Chicken Juicy and Tender

    This lemon garlic chicken recipe depends on proper cooking technique.

    Chicken should be cooked until just done and then removed from heat. Overcooking can make it dry, so it’s important to monitor cooking time closely.

    Allowing the chicken to rest briefly also helps retain moisture.


    How to Balance Lemon and Garlic Flavor

    The key to this lemon garlic chicken recipe is balance.

    Lemon provides acidity and brightness, while garlic adds depth. Using both juice and zest enhances flavor without making the dish too sour.

    The butter and broth help round out the sauce and create a smoother taste.


    Variations You Can Try

    • Add cream for a richer sauce
    • Use herbs like thyme or oregano
    • Add spinach or mushrooms
    • Use bone-in chicken for more flavor


    Common Mistakes to Avoid

    • Using too much lemon
    • Overcooking chicken
    • Burning garlic
    • Skipping the sauce reduction


    Make-Ahead and Storage Tips

    This lemon garlic chicken recipe works well for meal prep.

    • Cook chicken ahead of time
    • Store up to 4 days
    • Reheat gently


    How to Turn This Into a Complete Meal

    This lemon garlic chicken recipe can easily become a full dinner.

    Serve it with grains like rice or quinoa along with vegetables to create a balanced plate. Adding a side dish or salad enhances both nutrition and variety.


    Final Thoughts

    This lemon garlic chicken recipe is simple, fresh, and reliable, making it a great option for everyday meals.


    Related Recipes You’ll Love

    – Baked Chicken Breast
    – Chicken and Broccoli Stir Fry
    – Garlic Butter Shrimp
    – Chicken Cacciatore
    – Creamy Mushroom Risotto


    Explore More Chicken Dinner Recipes

    Discover more easy and flavorful chicken dinner ideas below:

    – Chicken Dinner Recipes


    Explore More Easy Dinner Recipes

    Discover more quick and simple meal ideas for any night:

    – Easy Dinner Recipes


    Author Note

    Dinners Recipe Team shares simple, reliable recipes designed for home cooks. Our goal is to make cooking easier while delivering flavorful, satisfying meals.

  • Shrimp Fried Rice Recipe

    Shrimp Fried Rice Recipe

    Shrimp fried rice recipe is a quick and flavorful dish made with shrimp, rice, eggs, and vegetables. This shrimp fried rice recipe is perfect for using leftover rice and creating a balanced meal in under 30 minutes.

    This shrimp fried rice recipe focuses on high-heat cooking and simple ingredients to deliver a dish with great texture and flavor. It’s a reliable option for weeknight dinners or quick lunches.


    Table of Contents

    • Ingredients
    • How to Make Shrimp Fried Rice Recipe
    • Pro Tips for Best Results
    • Serving Suggestions for Shrimp Fried Rice
    • Nutritional Information
    • Frequently Asked Questions


    Why This Shrimp Fried Rice Recipe Works

    This shrimp fried rice recipe is designed to create a balanced and satisfying dish.

    • Shrimp cooks quickly and stays tender
    • Day-old rice provides better texture
    • Eggs add richness
    • Simple seasoning enhances flavor


    Ingredients

    For the Rice

    • 3 cups cooked rice (preferably day-old)
    • 300 g shrimp, peeled and deveined
    • 2 eggs
    • 2 tablespoons oil

    For Flavor

    • 2 tablespoons soy sauce
    • 1 teaspoon sesame oil
    • 1 teaspoon garlic, minced
    • ½ teaspoon ginger, minced

    Vegetables

    • ½ cup peas and carrots
    • 2 green onions


    How to Make Shrimp Fried Rice Recipe

    Step 1: Prepare the Ingredients

    Ensure rice is separated and shrimp is cleaned and dried.

    Step 2: Cook the Eggs

    Scramble eggs in a pan and set aside.

    Step 3: Cook the Shrimp

    Cook shrimp for 2–3 minutes until pink. Remove and set aside.

    Step 4: Cook Aromatics

    Add garlic and ginger and cook briefly.

    Step 5: Stir-Fry the Rice

    Add rice and cook over high heat, breaking up clumps.

    Step 6: Combine

    Add shrimp, eggs, vegetables, and sauce. Stir until evenly mixed.

    Step 7: Serve

    Serve hot.


    Pro Tips for Best Results

    • Use day-old rice for best texture
    • Cook over high heat
    • Do not overcook shrimp
    • Break up rice before cooking


    Serving Suggestions for Shrimp Fried Rice

    Serve with:

    • Stir-fried vegetables
    • Soup
    • Salad

    This shrimp fried rice recipe pairs well with dishes like this Chicken and Broccoli Stir Fry for a complete meal.


    Nutritional Information (Approx. per serving)

    Calories: 400–500 kcal
    Protein: 20–25g
    Carbohydrates: 40–50g
    Fat: 15–20g
    Sodium: Moderate


    Storage and Reheating

    Store in the refrigerator for up to 3 days.

    For best results:

    • Reheat in a pan
    • Add a small amount of oil or water


    Frequently Asked Questions

    Can I use fresh rice?

    Yes, but let it cool and dry slightly first.

    Can I use frozen shrimp?

    Yes, thaw and dry before cooking.


    How to Get Perfect Fried Rice Texture

    This shrimp fried rice recipe depends on the texture of the rice.

    Day-old rice is ideal because it is drier and less sticky. Fresh rice can be used, but it should be cooled first to avoid clumping.

    Cooking over high heat helps remove excess moisture and creates the slightly crisp texture found in restaurant-style fried rice.


    How to Keep Shrimp Tender and Juicy

    Shrimp cooks very quickly and should not be overcooked.

    In this shrimp fried rice recipe, the shrimp is cooked separately first and then added back at the end. This prevents it from becoming tough or rubbery.


    Balancing Flavor in Fried Rice

    This shrimp fried rice recipe uses simple seasoning for a balanced taste.

    Soy sauce adds saltiness, sesame oil adds aroma, and garlic and ginger provide depth. The goal is to enhance the rice without overpowering it.


    Variations You Can Try

    • Add chicken or beef
    • Use different vegetables
    • Add chili flakes for heat
    • Use brown rice for a healthier version


    Common Mistakes to Avoid

    • Using wet or fresh rice
    • Overcooking shrimp
    • Cooking on low heat
    • Adding too much sauce


    Make-Ahead and Storage Tips

    This shrimp fried rice recipe is ideal for quick meals.

    • Prepare ingredients in advance
    • Store leftovers up to 3 days
    • Reheat properly


    How to Turn This Into a Complete Meal

    This shrimp fried rice recipe can easily become a full dinner.

    Serve it with additional protein or vegetables to create a more balanced meal. Adding a side dish or soup can make it more filling while keeping preparation simple.


    Final Thoughts

    This shrimp fried rice recipe is fast, flexible, and delivers consistent flavor, making it a dependable option for any day of the week.


    Related Recipes You’ll Love

    – Chicken and Broccoli Stir Fry
    – Garlic Butter Shrimp
    – Beef and Broccoli
    – Mongolian Beef
    – Kung Pao Chicken


    Explore More Easy Dinner Recipes

    Discover more quick and simple meal ideas for any night:

    – Easy Dinner Recipes


    Author Note

    Dinners Recipe Team shares simple, reliable recipes designed for home cooks. Our goal is to make cooking easier while delivering flavorful, satisfying meals.

  • Garlic Butter Steak Bites Recipe

    Garlic Butter Steak Bites Recipe

    Garlic butter steak bites recipe is a quick and flavorful dish made with tender pieces of beef cooked in a rich garlic butter sauce. This garlic butter steak bites recipe is perfect for busy weeknights and comes together in under 20 minutes.

    This garlic butter steak bites recipe focuses on high-heat cooking and simple ingredients to create a dish that is both satisfying and easy to prepare. The combination of garlic and butter enhances the natural flavor of the beef without overpowering it.


    Table of Contents

    • Ingredients
    • How to Make Garlic Butter Steak Bites Recipe
    • Pro Tips for Best Results
    • Serving Suggestions for Garlic Butter Steak Bites
    • Nutritional Information
    • Frequently Asked Questions


    Why This Garlic Butter Steak Bites Recipe Works

    This garlic butter steak bites recipe is designed for quick cooking and strong flavor.

    • Small pieces cook quickly and evenly
    • Garlic butter adds richness
    • High heat creates a seared exterior
    • Simple ingredients keep it easy


    Ingredients

    For the Steak

    • 500 g sirloin or ribeye, cut into bite-sized pieces
    • Salt and pepper
    • 1 tablespoon olive oil

    For the Garlic Butter

    • 3 tablespoons butter
    • 4 cloves garlic, minced
    • 1 teaspoon fresh parsley


    How to Make Garlic Butter Steak Bites Recipe

    Step 1: Prepare the Steak

    Pat steak dry and season with salt and pepper.

    Step 2: Heat the Pan

    Heat oil in a skillet over medium-high heat.

    Step 3: Sear the Steak

    Cook steak pieces in batches until browned on all sides.

    Step 4: Add Garlic Butter

    Reduce heat, add butter and garlic, and cook briefly.

    Step 5: Finish

    Toss steak in garlic butter and add parsley.

    Step 6: Serve

    Serve immediately while hot.


    Pro Tips for Best Results

    • Do not overcrowd the pan
    • Use high heat for a good sear
    • Let steak rest briefly before serving
    • Use a tender cut like sirloin or ribeye


    Serving Suggestions for Garlic Butter Steak Bites

    Serve with:

    • Rice
    • Potatoes
    • Vegetables
    • Salad

    This garlic butter steak bites recipe pairs well with dishes like this Mongolian Beef for a complete meal.


    Nutritional Information (Approx. per serving)

    Calories: 400–500 kcal
    Protein: 25–30g
    Carbohydrates: 5–10g
    Fat: 25–30g
    Sodium: Moderate


    Storage and Reheating

    Store in the refrigerator for up to 2–3 days.

    For best results:

    • Reheat gently in a pan
    • Avoid overcooking


    Frequently Asked Questions

    What cut of steak works best?

    Sirloin or ribeye works best for tenderness.

    Can I cook this in advance?

    Yes, but it’s best served fresh.


    How to Get a Perfect Sear on Steak Bites

    This garlic butter steak bites recipe depends on proper searing technique.

    Using high heat allows the steak to develop a browned exterior while staying juicy inside. Cooking in batches prevents overcrowding and ensures even browning.

    Patting the steak dry before cooking helps improve the sear and prevents steaming.


    How to Balance Garlic and Butter Flavor

    Garlic butter is the key flavor component in this garlic butter steak bites recipe.

    Cooking garlic gently prevents it from burning and becoming bitter. The butter should melt and coat the steak evenly without becoming overly greasy.

    Adding fresh herbs at the end enhances flavor and adds freshness.


    Variations You Can Try

    • Add mushrooms or onions
    • Use garlic herb butter
    • Add chili flakes for heat
    • Serve with dipping sauce


    Common Mistakes to Avoid

    • Overcrowding the pan
    • Using low heat
    • Overcooking steak
    • Burning the garlic


    Make-Ahead and Storage Tips

    This garlic butter steak bites recipe is best served fresh but can be prepared quickly.

    • Cut steak ahead of time
    • Store leftovers up to 3 days
    • Reheat gently


    How to Turn This Into a Complete Meal

    This garlic butter steak bites recipe can easily become a full dinner.

    Serve with potatoes, rice, or vegetables to create a balanced plate. Adding a simple side dish makes it more filling while keeping preparation quick and easy.


    Final Thoughts

    This garlic butter steak bites recipe is quick, flavorful, and easy to prepare, making it a reliable option for weeknight meals.


    Related Recipes You’ll Love

    – Mongolian Beef
    – Beef and Broccoli
    – Chicken and Broccoli Stir Fry
    – Baked Chicken Breast


    Explore More Easy Dinner Recipes

    Discover more quick and simple meal ideas for any night:

    – Easy Dinner Recipes


    Author Note

    Dinners Recipe Team shares simple, reliable recipes designed for home cooks. Our goal is to make cooking easier while delivering flavorful, satisfying meals.

  • Baked Chicken Breast Recipe

    Baked Chicken Breast Recipe

    Baked chicken breast recipe is a simple and reliable way to cook chicken that stays juicy and flavorful. This baked chicken breast recipe uses basic seasonings and proper cooking technique to create tender chicken with a lightly golden exterior.

    This baked chicken breast recipe is perfect for weeknight dinners, meal prep, or adding protein to salads and other dishes. With the right method, you can avoid dry chicken and achieve consistent results every time.


    Table of Contents

    • Ingredients
    • How to Make Baked Chicken Breast Recipe
    • Pro Tips for Best Results
    • Serving Suggestions for Baked Chicken Breast
    • Nutritional Information
    • Frequently Asked Questions


    Why This Baked Chicken Breast Recipe Works

    This baked chicken breast recipe is designed to keep the chicken moist and flavorful.

    • Even cooking prevents dryness
    • Simple seasoning enhances flavor
    • Proper temperature keeps texture tender
    • Quick preparation makes it convenient


    Ingredients

    • 2 chicken breasts
    • 1 tablespoon olive oil
    • 1 teaspoon garlic powder
    • 1 teaspoon paprika
    • ½ teaspoon salt
    • ½ teaspoon black pepper
    • 1 teaspoon dried herbs (optional)


    How to Make Baked Chicken Breast Recipe

    Step 1: Prepare the Chicken

    Pat chicken dry and trim if needed.

    Step 2: Season

    Rub with olive oil and season evenly.

    Step 3: Preheat Oven

    Preheat to 400°F (200°C).

    Step 4: Bake

    Place chicken on a baking sheet and bake for 18–22 minutes.

    Step 5: Rest

    Let rest for 5 minutes before slicing.

    Step 6: Serve

    Slice and serve.


    Pro Tips for Best Results

    • Use similar-sized chicken breasts
    • Do not overcook
    • Let chicken rest before cutting
    • Use a meat thermometer if possible


    Serving Suggestions for Baked Chicken Breast

    Serve with:

    • Rice
    • Vegetables
    • Salad
    • Potatoes

    This baked chicken breast recipe pairs well with dishes like this Chicken and Broccoli Stir Fry for a complete meal.


    Nutritional Information (Approx. per serving)

    Calories: 250–300 kcal
    Protein: 30–35g
    Carbohydrates: 0–5g
    Fat: 10–15g
    Sodium: Moderate


    Storage and Reheating

    Store in the refrigerator for up to 3–4 days.

    For best results:

    • Reheat gently
    • Add a small amount of liquid if needed


    Frequently Asked Questions

    How do I keep chicken from drying out?

    Do not overcook and allow it to rest after baking.

    Can I use frozen chicken?

    Yes, but thaw first for best results.


    How to Keep Chicken Breast Juicy

    This baked chicken breast recipe depends on proper temperature and timing.

    Chicken breast is lean, so it can dry out quickly if overcooked. Baking at the right temperature and removing the chicken once it reaches the correct internal temperature helps keep it moist.

    Allowing the chicken to rest after cooking lets the juices redistribute, improving texture and flavor.


    How to Season Chicken for Best Flavor

    This baked chicken breast recipe uses simple seasoning for a balanced taste.

    A mix of garlic powder, paprika, salt, and pepper provides flavor without overpowering the chicken. You can also add herbs like thyme or oregano for variety.

    Coating the chicken with a small amount of oil helps the seasoning stick and promotes even browning.


    Variations You Can Try

    • Add lemon juice for brightness
    • Use a marinade for deeper flavor
    • Add cheese or sauce
    • Slice and use in wraps or salads


    Common Mistakes to Avoid

    • Overcooking
    • Not seasoning enough
    • Skipping the resting step
    • Using uneven chicken sizes


    Make-Ahead and Storage Tips

    This baked chicken breast recipe is ideal for meal prep.

    • Cook in advance
    • Store up to 4 days
    • Use in multiple dishes


    How to Turn This Into a Complete Meal

    This baked chicken breast recipe can easily become a full dinner.

    Serve it with grains like rice or quinoa along with vegetables to create a balanced plate. Adding a sauce or dressing can enhance flavor while keeping preparation simple.

    This makes it a versatile option for both quick meals and planned meal prep.


    Final Thoughts

    This baked chicken breast recipe is simple, reliable, and perfect for creating a variety of meals with minimal effort.


    Related Recipes You’ll Love

    – Chicken and Broccoli Stir Fry
    – Kung Pao Chicken
    – Crispy Honey Chicken
    – Lemon Garlic Chicken


    Explore More Chicken Dinner Recipes

    Discover more easy and flavorful chicken dinner ideas below:

    – Chicken Dinner Recipes


    Explore More Easy Dinner Recipes

    Discover more quick and simple meal ideas for any night:

    – Easy Dinner Recipes


    Author Note

    Dinners Recipe Team shares simple, reliable recipes designed for home cooks. Our goal is to make cooking easier while delivering flavorful, satisfying meals.

  • Beef and Broccoli Recipe

    Beef and Broccoli Recipe

    Beef and broccoli recipe is a classic stir-fry dish made with tender slices of beef, crisp broccoli, and a savory sauce. This beef and broccoli recipe is quick to prepare and delivers balanced flavor with simple ingredients.

    This beef and broccoli recipe focuses on proper slicing, high-heat cooking, and a well-balanced sauce to create a reliable and satisfying meal. It’s ideal for weeknight dinners and pairs well with rice or noodles.

    This beef and broccoli recipe is known for its quick cooking time and balanced flavor, making it a popular choice for easy dinners.


    Table of Contents

    • Ingredients
    • How to Make Beef and Broccoli Recipe
    • Pro Tips for Best Results
    • Serving Suggestions for Beef and Broccoli
    • Nutritional Information
    • Frequently Asked Questions


    Why This Beef and Broccoli Recipe Works

    This beef and broccoli recipe is designed to create tender beef with a flavorful sauce.

    • Thin slicing keeps beef tender
    • Cornstarch creates a smooth texture
    • Broccoli adds freshness and balance
    • Sauce coats evenly without being heavy


    Ingredients

    For the Beef

    • 400 g flank steak or sirloin, thinly sliced
    • 1 tablespoon soy sauce
    • 1 tablespoon cornstarch
    • ½ teaspoon black pepper

    For the Sauce

    • 3 tablespoons soy sauce
    • 1 tablespoon oyster sauce
    • 1 teaspoon sugar
    • 1 teaspoon sesame oil
    • ½ cup water

    For the Stir Fry

    • 2 tablespoons oil
    • 3 cloves garlic, minced
    • 1 teaspoon ginger, minced
    • 2 cups broccoli florets


    How to Make Beef and Broccoli Recipe

    Step 1: Prepare the Beef

    Slice beef thinly against the grain. Mix with soy sauce, cornstarch, and pepper.

    Step 2: Make the Sauce

    Combine all sauce ingredients and set aside.

    Step 3: Cook the Beef

    Heat oil and cook beef in batches until browned. Remove and set aside.

    Step 4: Cook the Broccoli

    Stir-fry broccoli for 2–3 minutes. Add a small amount of water if needed.

    Step 5: Combine

    Return beef to the pan and add sauce. Cook until slightly thickened.

    Step 6: Serve

    Serve immediately with rice or noodles.


    Pro Tips for Best Results

    • Slice beef thinly against the grain
    • Do not overcrowd the pan
    • Use high heat for proper browning
    • Prepare all ingredients before cooking


    Serving Suggestions for Beef and Broccoli

    Serve with:

    • Steamed rice
    • Noodles
    • Fried rice

    This beef and broccoli recipe pairs well with dishes like this Chicken and Broccoli Stir Fry for a complete meal.


    Nutritional Information (Approx. per serving)

    Calories: 400–500 kcal
    Protein: 25–30g
    Carbohydrates: 15–20g
    Fat: 20–25g
    Sodium: Moderate


    Storage and Reheating

    Store in the refrigerator for up to 2–3 days.

    For best results:

    • Reheat in a pan
    • Add a small amount of water if needed


    Frequently Asked Questions

    What is the best cut of beef?

    Flank steak or sirloin works best.

    Can I use frozen broccoli?

    Yes, but thaw and drain first.


    How to Get Tender Beef for This Beef and Broccoli Recipe

    This beef and broccoli recipe depends on proper preparation.

    Slicing against the grain shortens muscle fibers, making the beef easier to chew. The cornstarch coating helps create a soft texture while also thickening the sauce.

    Cooking quickly over high heat ensures the beef stays tender and does not become tough.


    How to Cook Broccoli with the Right Texture

    The broccoli should be bright green and slightly crisp.

    Cooking it briefly over high heat preserves both texture and color. Adding a small amount of water allows it to steam slightly without becoming soft.

    Overcooking should be avoided, as it can make the broccoli mushy and less flavorful.


    Balancing the Sauce for Best Flavor

    This beef and broccoli recipe uses a simple sauce that combines savory and slightly sweet elements.

    Soy sauce provides saltiness, oyster sauce adds depth, and a small amount of sugar balances the flavor. The sauce should coat the ingredients lightly without becoming too thick or overpowering.


    Variations You Can Try

    • Add carrots or bell peppers
    • Increase garlic for stronger flavor
    • Add chili flakes for heat
    • Substitute chicken or tofu


    Common Mistakes to Avoid

    • Overcooking the beef
    • Not slicing correctly
    • Using low heat
    • Adding too much sauce


    Make-Ahead and Storage Tips

    This beef and broccoli recipe is ideal for quick meals.

    • Slice beef ahead of time
    • Prepare sauce in advance
    • Store leftovers up to 3 days


    How to Turn This Into a Complete Meal

    This beef and broccoli recipe can easily become a full dinner.

    Serve it with rice or noodles to create a balanced plate. Adding vegetables or a side dish improves both nutrition and variety.

    This makes it a practical option for both weeknight meals and meal prep.


    Final Thoughts

    This beef and broccoli recipe is simple, fast, and delivers reliable flavor with minimal effort.


    Related Recipes You’ll Love

    – Chicken and Broccoli Stir Fry
    – Mongolian Beef
    – Kung Pao Chicken


    Explore More Easy Dinner Recipes

    Discover more quick and simple meal ideas for any night:

    – Easy Dinner Recipes


    Author Note

    Dinners Recipe Team shares simple, reliable recipes designed for home cooks. Our goal is to make cooking easier while delivering flavorful, satisfying meals.

  • Chicken and Broccoli Stir Fry Recipe

    Chicken and Broccoli Stir Fry Recipe

    Chicken and broccoli stir fry recipe is a quick and flavorful dish made with tender chicken, fresh broccoli, and a simple savory sauce. This chicken and broccoli stir fry recipe is perfect for busy weeknights and comes together in under 30 minutes.

    This chicken and broccoli stir fry recipe focuses on high-heat cooking and balanced flavors to create a satisfying meal with minimal ingredients. It’s a reliable option when you want something fast, healthy, and easy to prepare.


    Table of Contents

    • Ingredients
    • How to Make Chicken and Broccoli Stir Fry Recipe
    • Pro Tips for Best Results
    • Serving Suggestions for Chicken and Broccoli Stir Fry
    • Nutritional Information
    • Frequently Asked Questions


    Why This Chicken and Broccoli Stir Fry Recipe Works

    This chicken and broccoli stir fry recipe is designed for speed and flavor.

    • Quick cooking keeps chicken tender
    • Broccoli adds texture and balance
    • Simple sauce coats evenly
    • High heat enhances flavor


    Ingredients

    For the Chicken

    • 300 g chicken breast or thighs
    • 1 tablespoon soy sauce
    • 1 teaspoon cornstarch
    • ½ teaspoon black pepper

    For the Sauce

    • 2 tablespoons soy sauce
    • 1 tablespoon oyster sauce
    • 1 teaspoon sugar
    • 1 teaspoon sesame oil
    • 2 tablespoons water

    For the Stir Fry

    • 2 tablespoons oil
    • 3 cloves garlic, minced
    • 1 teaspoon ginger, minced
    • 2 cups broccoli florets


    How to Make Chicken and Broccoli Stir Fry Recipe

    Step 1: Prepare the Chicken

    Slice chicken thinly and mix with soy sauce, cornstarch, and pepper.

    Step 2: Make the Sauce

    Combine all sauce ingredients and set aside.

    Step 3: Cook the Chicken

    Heat oil and cook chicken until lightly browned. Remove and set aside.

    Step 4: Cook the Broccoli

    Stir-fry broccoli for 2–3 minutes. Add a splash of water if needed.

    Step 5: Combine

    Return chicken to the pan and add sauce. Stir until coated and slightly thickened.

    Step 6: Serve

    Serve immediately while hot.


    Pro Tips for Best Results

    • Slice chicken thinly for tenderness
    • Use high heat for best texture
    • Do not overcook broccoli
    • Prepare ingredients before cooking


    Serving Suggestions for Chicken and Broccoli Stir Fry

    Serve with:

    • Steamed rice
    • Noodles
    • Fried rice

    This chicken and broccoli stir fry recipe pairs well with dishes like this Kung Pao Chicken for a complete meal.


    Nutritional Information (Approx. per serving)

    Calories: 350–450 kcal
    Protein: 25–30g
    Carbohydrates: 15–20g
    Fat: 15–20g
    Sodium: Moderate


    Storage and Reheating

    Store in the refrigerator for up to 2–3 days.

    For best results:

    • Reheat in a pan
    • Add a small amount of water if needed


    Frequently Asked Questions

    Can I use frozen broccoli?

    Yes, but thaw and drain first.

    Can I substitute chicken?

    Yes, shrimp, beef, or tofu work well.


    How to Keep Chicken Tender and Juicy

    This chicken and broccoli stir fry recipe depends on proper preparation.

    Slicing the chicken thinly helps it cook quickly and evenly. The cornstarch coating creates a light barrier that keeps the meat juicy during cooking.

    Cooking over medium-high heat ensures the chicken stays tender without becoming dry.


    How to Cook Broccoli with the Right Texture

    The broccoli should be crisp-tender, not soft.

    Cooking it briefly over high heat helps retain color and texture. Adding a small amount of water can help steam the broccoli slightly while keeping it firm.

    Overcooking will cause the broccoli to lose both texture and flavor.


    Balancing the Sauce for Best Flavor

    This chicken and broccoli stir fry recipe uses a simple but effective sauce.

    Soy sauce provides saltiness, oyster sauce adds depth, and a small amount of sugar balances the flavor. The sauce should lightly coat the ingredients without becoming too thick or heavy.


    Variations You Can Try

    • Add carrots or bell peppers
    • Use brown sauce for a richer flavor
    • Add chili flakes for heat
    • Substitute with tofu for a vegetarian version


    Common Mistakes to Avoid

    • Overcooking chicken
    • Using low heat
    • Adding too much sauce
    • Not prepping ingredients in advance


    Make-Ahead and Storage Tips

    This chicken and broccoli stir fry recipe is ideal for quick meals.

    • Prepare sauce ahead
    • Slice chicken in advance
    • Store leftovers up to 3 days


    How to Turn This Into a Complete Meal

    This chicken and broccoli stir fry recipe can easily become a full dinner.

    Serve it over rice or noodles to create a balanced meal. Adding vegetables or a side dish enhances both nutrition and variety.

    This makes it a practical option for both weeknight dinners and meal prep.


    Final Thoughts

    This chicken and broccoli stir fry recipe is fast, simple, and delivers reliable flavor with minimal effort.


    Related Recipes You’ll Love

    – Kung Pao Chicken
    – Crispy Honey Chicken
    – Mongolian Beef


    Explore More Chicken Dinner Recipes

    Discover more easy and flavorful chicken dinner ideas below:

    – Chicken Dinner Recipes


    Explore More Easy Dinner Recipes

    Discover more quick and simple meal ideas for any night:

    – Easy Dinner Recipes


    Author Note

    Dinners Recipe Team shares simple, reliable recipes designed for home cooks. Our goal is to make cooking easier while delivering flavorful, satisfying meals.

  • Pan Seared Salmon Recipe

    Pan Seared Salmon Recipe

    Pan seared salmon recipe is a simple and reliable way to cook salmon with crisp skin and a tender interior. This pan seared salmon recipe uses high heat and minimal ingredients to create a flavorful and well-balanced dish.

    This pan seared salmon recipe is ideal for quick dinners and pairs well with a variety of sides. With the right technique, you can achieve restaurant-quality results at home in just minutes.


    Table of Contents

    • Ingredients
    • How to Make Pan Seared Salmon Recipe
    • Pro Tips for Best Results
    • Serving Suggestions for Pan Seared Salmon
    • Nutritional Information
    • Frequently Asked Questions


    Why This Pan Seared Salmon Recipe Works

    This pan seared salmon recipe focuses on texture and flavor.

    • High heat creates crispy skin
    • Simple seasoning enhances natural flavor
    • Quick cooking keeps salmon moist
    • Minimal ingredients keep it easy


    Ingredients

    • 2 salmon fillets (skin-on)
    • 1 tablespoon olive oil
    • 1 tablespoon butter
    • Salt and pepper
    • 1 teaspoon lemon juice
    • Fresh herbs (optional)


    How to Make Pan Seared Salmon Recipe

    Step 1: Prepare the Salmon

    Pat salmon dry and season with salt and pepper.

    Step 2: Heat the Pan

    Heat oil in a skillet over medium-high heat.

    Step 3: Sear Skin Side

    Place salmon skin-side down and cook for 4–5 minutes until crisp.

    Step 4: Flip and Finish

    Flip and cook for another 2–3 minutes.

    Step 5: Add Butter

    Add butter and spoon over the salmon.

    Step 6: Serve

    Finish with lemon juice and serve immediately.


    Pro Tips for Best Results

    • Pat salmon dry before cooking
    • Do not move salmon while searing
    • Use medium-high heat
    • Avoid overcooking


    Serving Suggestions for Pan Seared Salmon

    Serve with:

    • Rice
    • Roasted vegetables
    • Salad
    • Potatoes

    This pan seared salmon recipe pairs well with seafood dishes like this Garlic Butter Shrimp for a complete meal.


    Nutritional Information (Approx. per serving)

    Calories: 400–500 kcal
    Protein: 30–35g
    Carbohydrates: 0–5g
    Fat: 25–30g
    Sodium: Moderate


    Storage and Reheating

    This dish is best served fresh.

    • Store up to 2 days
    • Reheat gently in a pan


    Frequently Asked Questions

    Can I cook salmon without skin?

    Yes, but skin helps protect the fish and adds texture.

    How do I know salmon is done?

    It should flake easily and be slightly opaque inside.


    How to Get Crispy Salmon Skin

    This pan seared salmon recipe depends on proper searing technique.

    Patting the salmon dry removes excess moisture, allowing the skin to crisp. Placing the fish skin-side down in a hot pan and leaving it undisturbed helps create a golden crust.

    Pressing lightly during the first minute can prevent curling and ensure even contact with the pan.


    How to Keep Salmon Tender and Moist

    The key to this pan seared salmon recipe is not overcooking.

    Salmon should be cooked until just opaque in the center. Residual heat will continue cooking it slightly after removing from the pan.

    Cooking at too low a temperature can result in dry fish, while too high heat can burn the exterior before the inside is done.


    Variations You Can Try

    • Add garlic and herbs to butter
    • Use lemon zest for extra brightness
    • Add a honey glaze for sweetness
    • Serve with a light sauce


    Common Mistakes to Avoid

    • Not drying the salmon
    • Moving it too early
    • Overcooking
    • Using low heat


    Make-Ahead and Storage Tips

    This pan seared salmon recipe is best fresh but can be prepared quickly.

    • Season ahead of time
    • Store leftovers up to 2 days
    • Reheat gently


    How to Turn This Into a Complete Meal

    This pan seared salmon recipe can easily become a full dinner.

    Serve it with grains like rice or quinoa along with vegetables to create a balanced plate. Adding a simple sauce or dressing can enhance flavor without complicating the dish.

    This makes it a practical option for both quick meals and more complete dinners.


    Final Thoughts

    This pan seared salmon recipe is quick, simple, and delivers excellent flavor with minimal effort.


    Related Recipes You’ll Love

    – Garlic Butter Shrimp
    – Gambas al Ajillo
    – Grilled Sardines


    Explore More Easy Dinner Recipes

    Discover more quick and simple meal ideas for any night:

    – Easy Dinner Recipes


    Author Note

    Dinners Recipe Team shares simple, reliable recipes designed for home cooks. Our goal is to make cooking easier while delivering flavorful, satisfying meals.

  • Garlic Butter Shrimp Recipe

    Garlic Butter Shrimp Recipe

    Garlic butter shrimp recipe is a quick and flavorful dish made with shrimp, butter, garlic, and simple seasonings. This garlic butter shrimp recipe cooks in minutes and delivers rich flavor with minimal ingredients.

    This garlic butter shrimp recipe is ideal for busy weeknights or when you want a simple seafood dish that pairs well with a variety of sides. The combination of garlic and butter creates a smooth, savory sauce that coats the shrimp perfectly.


    Table of Contents

    • Ingredients
    • How to Make Garlic Butter Shrimp Recipe
    • Pro Tips for Best Results
    • Serving Suggestions for Garlic Butter Shrimp
    • Nutritional Information
    • Frequently Asked Questions


    Why This Garlic Butter Shrimp Recipe Works

    This garlic butter shrimp recipe is designed to be fast, simple, and flavorful.

    • Shrimp cooks quickly and stays tender
    • Butter creates a rich, smooth sauce
    • Garlic adds depth of flavor
    • Simple ingredients make it easy to prepare


    Ingredients

    • 400 g large shrimp, peeled and deveined
    • 3 tablespoons butter
    • 4–5 cloves garlic, minced
    • 1 tablespoon olive oil
    • Salt and pepper
    • 1 tablespoon lemon juice
    • 2 tablespoons fresh parsley


    How to Make Garlic Butter Shrimp Recipe

    Step 1: Prepare the Shrimp

    Pat shrimp dry and season lightly with salt and pepper.

    Step 2: Heat the Pan

    Heat olive oil and butter over medium heat.

    Step 3: Cook the Garlic

    Add garlic and cook gently until fragrant.

    Step 4: Cook the Shrimp

    Add shrimp and cook 2–3 minutes per side until pink and opaque.

    Step 5: Finish

    Add lemon juice and parsley. Toss to coat.

    Step 6: Serve

    Serve immediately while hot.


    Pro Tips for Best Results

    • Do not overcook shrimp
    • Use fresh garlic for best flavor
    • Pat shrimp dry before cooking
    • Cook over medium heat


    Serving Suggestions for Garlic Butter Shrimp

    Serve with:

    • Rice
    • Pasta
    • Crusty bread
    • Roasted vegetables

    This garlic butter shrimp recipe pairs well with seafood dishes like this Gambas al Ajillo for a Mediterranean-style meal.


    Nutritional Information (Approx. per serving)

    Calories: 300–400 kcal
    Protein: 25–30g
    Carbohydrates: 5–10g
    Fat: 20–25g
    Sodium: Moderate


    Storage and Reheating

    This dish is best served fresh.

    • Store up to 1–2 days
    • Reheat gently in a pan


    Frequently Asked Questions

    Can I use frozen shrimp?

    Yes, fully thaw and pat dry first.

    Can I use margarine instead of butter?

    Butter is recommended for better flavor.


    How to Keep Shrimp Tender and Juicy

    This garlic butter shrimp recipe depends on proper cooking time.

    Shrimp cooks very quickly, usually within a few minutes. Overcooking can make it tough, so it should be removed from heat as soon as it turns pink and opaque.

    Using medium heat helps cook the shrimp evenly without burning the butter or garlic.


    How to Build Flavor with Garlic and Butter

    Garlic and butter are the foundation of this garlic butter shrimp recipe.

    Cooking garlic gently releases its flavor into the butter, creating a rich base. The butter should melt fully but not brown too much.

    Adding lemon juice at the end helps balance the richness and keeps the dish from feeling too heavy.


    Variations You Can Try

    • Add chili flakes for heat
    • Add white wine for depth
    • Use herbs like thyme or basil
    • Serve over pasta for a fuller meal


    Common Mistakes to Avoid

    • Overcooking shrimp
    • Burning garlic
    • Using too much heat
    • Skipping the drying step


    Make-Ahead and Storage Tips

    This garlic butter shrimp recipe is best fresh but can be prepared quickly.

    • Prep shrimp ahead of time
    • Store up to 2 days
    • Reheat gently


    How to Turn This Into a Complete Meal

    This garlic butter shrimp recipe can easily become a full dinner.

    Serve it over rice or pasta to absorb the sauce. Adding vegetables or a side salad creates a balanced meal without much extra effort.

    This makes it a versatile option for both quick meals and more complete dinners.


    Final Thoughts

    This garlic butter shrimp recipe is simple, fast, and packed with flavor, making it a reliable option for any night of the week.


    Related Recipes You’ll Love

    – Gambas al Ajillo
    – Grilled Sardines
    – Paella Valenciana


    Explore More Easy Dinner Recipes

    Discover more quick and simple meal ideas for any night:

    – Easy Dinner Recipes


    Author Note

    Dinners Recipe Team shares simple, reliable recipes designed for home cooks. Our goal is to make cooking easier while delivering flavorful, satisfying meals.

  • Easy Dinner Recipes – Simple Meals for Every Night

    Easy Dinner Recipes – Simple Meals for Every Night

    Easy dinner recipes are essential for busy schedules, helping you create flavorful meals without spending hours in the kitchen. These easy dinner recipes focus on simple ingredients, quick cooking methods, and reliable results.

    This collection of quick meals includes a variety of dishes, from quick stir-fries to comforting classics, making it easy to find something for any night of the week.

    Many home cooks rely on simple meal planning techniques to make dinner preparation faster and more efficient.


    Table of Contents

    • Why Easy Dinner Recipes Matter
    • Best Easy Dinner Recipes to Try
    • Tips for Making Dinner Faster
    • How to Choose the Right Recipe


    Why Easy Dinner Recipes Matter

    Easy meals make cooking more manageable and consistent.

    • Save time during busy weekdays
    • Use simple, accessible ingredients
    • Reduce stress when planning meals
    • Help build a regular cooking routine

    These easy dinner recipes are designed to deliver good flavor without complicated steps.


    Best Easy Dinner Recipes to Try

    Here are some of the best easy dinner recipes you can make at home:


    Southern Fried Chicken Recipe

    A crispy and satisfying comfort food classic that works well for family meals.

    Southern Fried Chicken


    Chicken Teriyaki Recipe

    A quick and balanced dish with a sweet and savory sauce.

    Chicken Teriyaki


    Kung Pao Chicken Recipe

    A bold stir-fry with tender chicken and a balanced sauce.

    Kung Pao Chicken


    Crispy Honey Chicken Recipe

    A sweet and crunchy dish that is easy to prepare and great for dinner.

    Crispy Honey Chicken


    Mongolian Beef Recipe

    A fast stir-fry with tender beef and a rich, savory-sweet sauce.

    Mongolian Beef


    Classic American Meatloaf Recipe

    A simple comfort food made with ground meat and basic ingredients.

    Classic American Meatloaf


    Catalan Chicken with Prunes

    A flavorful dish combining savory chicken with a subtle sweetness.

    Catalan Chicken with Prunes


    Tips for Making Dinner Faster

    Making dinner quickly is all about preparation and simplicity.

    • Prep ingredients ahead of time
    • Use high-heat cooking methods
    • Keep recipes simple
    • Choose meals with fewer steps

    These small adjustments can save time without sacrificing flavor.


    How to Choose the Right Recipe

    Choosing the right recipe depends on your situation.

    • For quick meals: stir-fries
    • For comfort food: baked or fried dishes
    • For lighter meals: simple sauces and vegetables

    This helps you match your cooking to your time and preference.


    How to Build a Balanced Dinner

    A balanced dinner includes protein, carbohydrates, and vegetables.

    Pairing dishes like chicken or beef with rice, noodles, or potatoes creates a satisfying base. Adding vegetables improves both nutrition and flavor.

    Simple combinations can turn easy dinner recipes into complete meals.


    Types of Easy Dinner Recipes You Can Make

    There are many types of easy dinner recipes depending on your cooking style and available time.

    Quick stir-fry recipes are ideal for busy nights because they cook fast and require minimal preparation. Dishes like Kung Pao Chicken or Mongolian Beef are great examples of this approach.

    Comfort food recipes such as meatloaf or fried chicken are better suited for relaxed evenings when you want something filling and satisfying.

    Lighter meals like teriyaki chicken or simple sautéed dishes are perfect when you want something flavorful without being too heavy.

    By mixing different styles of easy dinner recipes, you can keep your meals interesting while still saving time in the kitchen.


    Final Thoughts

    These simple dinner ideas make it simple to cook flavorful meals at home without complicated steps. With a variety of options, you can find something that fits your schedule and taste.


    Explore More Chicken Dinner Recipes

    Discover more flavorful chicken meals for any occasion:

    – Chicken Dinner Recipes


    Author Note

    Dinners Recipe Team shares simple, reliable recipes designed for home cooks. Our goal is to make cooking easier while delivering flavorful, satisfying meals.